What is GraphQL UI? #
GraphQL UI is a powerful web-based interface (Banana Cake Pop, Nitro) for exploring and interacting with GraphQL APIs. It allows users to browse schemas, write queries, and test them live — all in a clean, developer-friendly environment.
GraphQL UI URLs #
You can access the GraphQL UI for each environment here:
https://api.xoap.io/graphql/ui
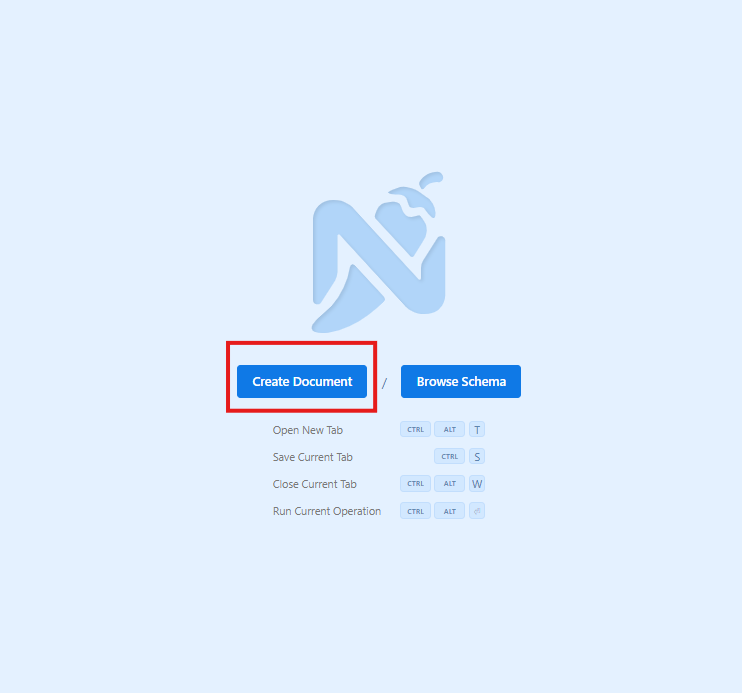
Create a New Document #
Once the GraphQL UI loads, click on the “Create Document” button to begin.
Note: If your browser blocks pop-ups, be sure to allow them when prompted.
Configure Authentication #
Before you can query the API, you’ll need to authenticate your session.
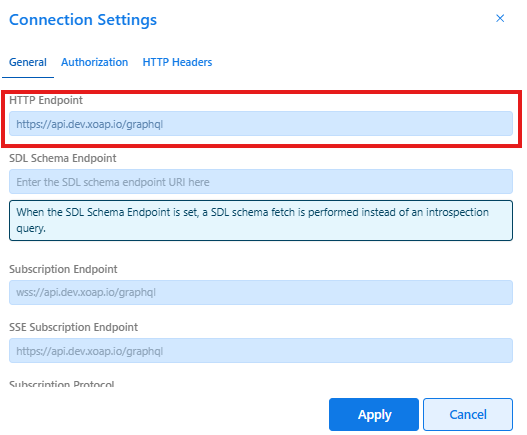
Open Settings #
Click the Settings icon in the top-right corner to configure the connection. You’ll set both the endpoint and OAuth2 credentials.
HTTP Endpoint #
Under the “HTTP Endpoint” section, enter the correct URL for your environment:
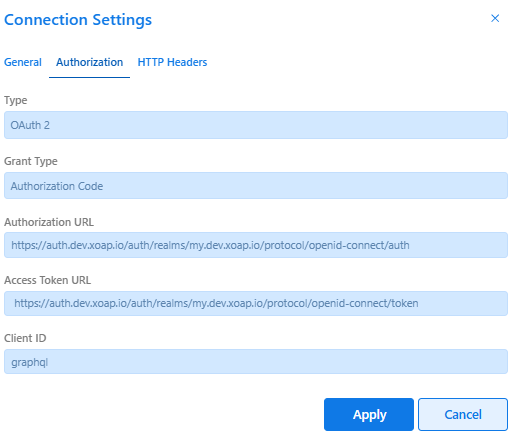
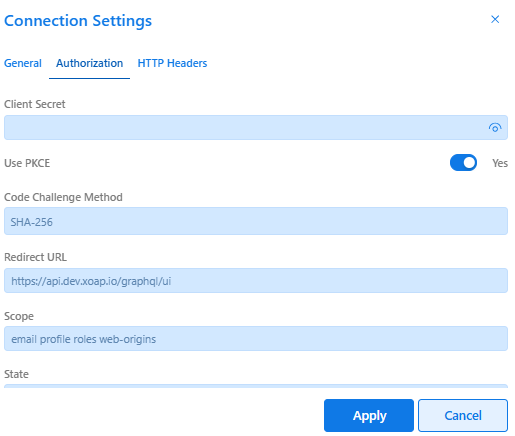
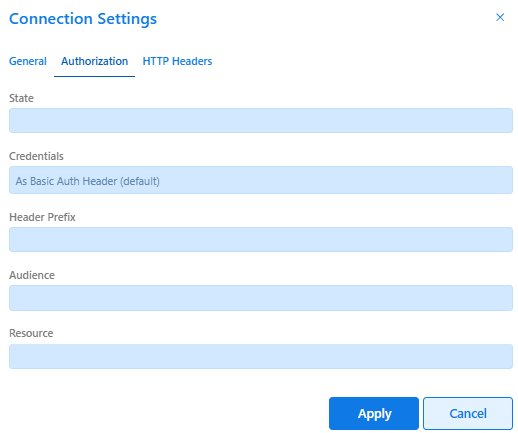
Authorization Setup (OAuth2) #
Under the “Authorization” section, configure the following:
| Field | Value |
| Type | OAuth 2 |
| Grant Type | Authorization Code |
| Authorization URL | https://auth.xoap.io/auth/realms/my.xoap.io/protocol/openid-connect/auth |
| Access Token URL | https://auth.xoap.io/auth/realms/my.xoap.io/protocol/openid-connect/token |
| Client ID | graphql |
| Use PKCE | ✅ Yes |
| Code Challenge Method | SHA-256 |
| Redirect URL | https://api.xoap.io/graphql/ui/ |
| Scope | email profile roles web-origins |
| Credentials | As Basic Auth Header (default) |
Authenticate & Apply #
- Click the Fetch button.
- You will be redirected to the XOAP login page.
- Enter your credentials.
- Once authenticated, you’ll be redirected back to the GraphQL UI.
- Click “Apply” to confirm the token — it will be added to your request headers.

Add Tenant Header #
As with Swagger, the API requires a Tenant ID to be passed in the headers.
We’ll cover how to set this header next.
Add the Tenant Header #
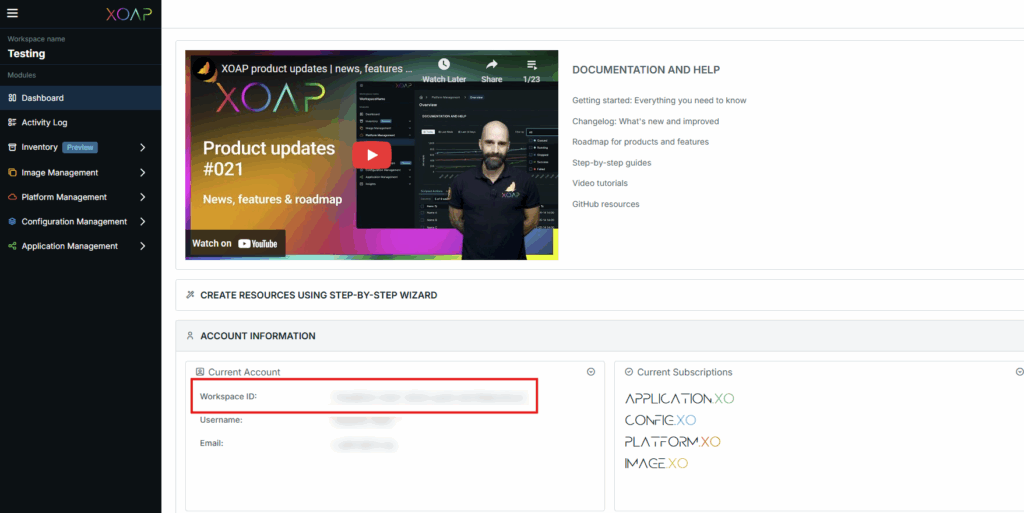
In order for your API calls to be accepted, you must include a valid Tenant ID in the request headers.
This step is required — our API uses the Tenant header to identify the workspace making the request. Tenant ID (also referenced as Workspace ID in some cases) can be obtained from app.xoap.io dashboard as shown here:
To do this:
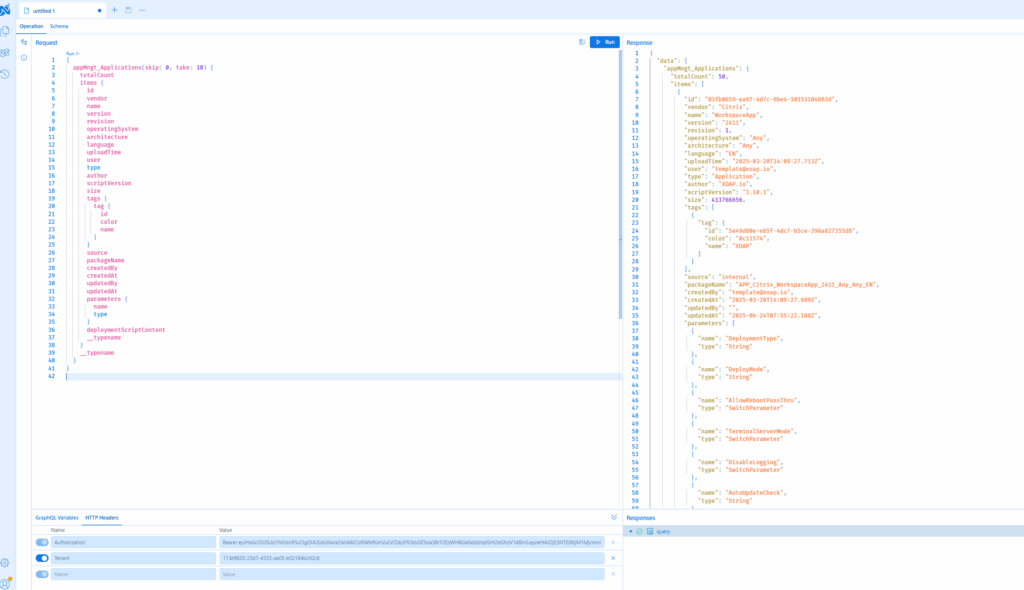
- Scroll to the bottom-left HTTP Headers area of the GraphQL UI (below the authentication token section).
- Click on “Header”.
- Enter the following values:
- Name: Tenant
- Value: Your Tenant ID
This header is required for all authenticated requests to be valid.

Once added, the Tenant header will be included in all future GraphQL requests sent from the UI.
Load the Schema #
Once authenticated and the headers are set, you need to load the schema so the UI can provide query assistance and autocompletion.
You can do this by either:
- Pressing Ctrl + Alt + R
- Clicking the Reload Schema button in the UI
This will fetch the full schema from the server and enable features like field suggestions, type info, and validation.
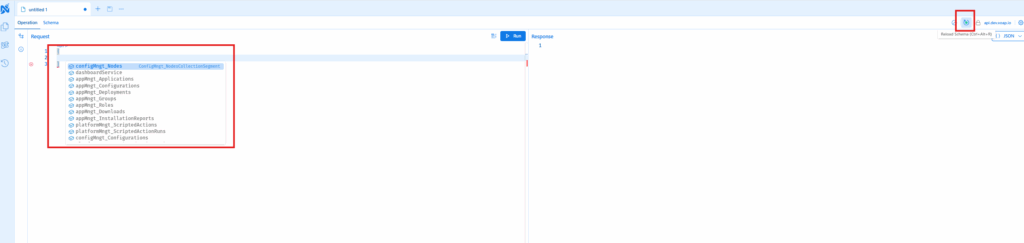
After the schema loads, try typing a query — the UI will provide IntelliSense-style suggestions based on the available types and fields.
Run a Test Query #
Now you’re ready to write and execute GraphQL queries.
- Use the editor panel to enter your query.
- Click the Run (▶️) button or press Ctrl + Enter to execute.
- The response will be shown in the right-hand panel.
This is a great way to:
- Explore the API without needing frontend access
- Quickly test custom queries or troubleshoot issues
- Copy working queries into your own scripts or tools
You’ve now completed setup and successfully tested the XOAP GraphQL API.
Optional: You can now combine this with Swagger UI for complete REST + GraphQL coverage in your development or automation setup.