XOAP Connector is an agent designed for secure system automation. The Connector enables centralized management of distributed systems and simplifies the operation of hybrid IT infrastructures.
It runs on Windows, macOS and Linux, and connects directly to your XOAP backend. Currently, supported on-premises environments include vSphere and Nutanix.
Below, you will find the initial steps to get started with the Connector.
Add Connection #
The Connections area in your XOAP Workspace is where you define credentials to link your on-premises environment with the XOAP platform.
To create a new connection:
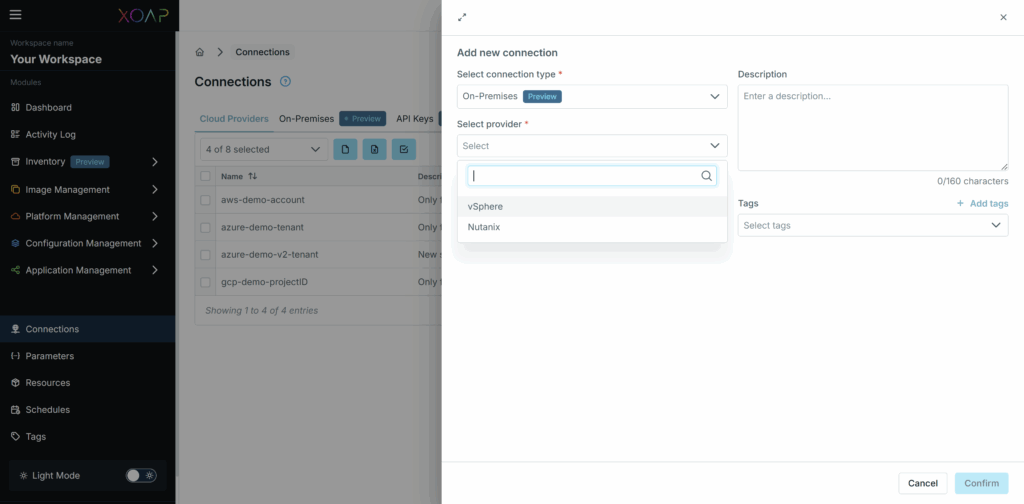
1. Go to Connections and click New Connection.
2. Select one of the on-premises environments and fill in the required fields.
3. Click Confirm to save the connection.
Add API key #
Adding an API key to your XOAP environment enables a secure connection between XOAP and your Connector device.
To create a new API key:
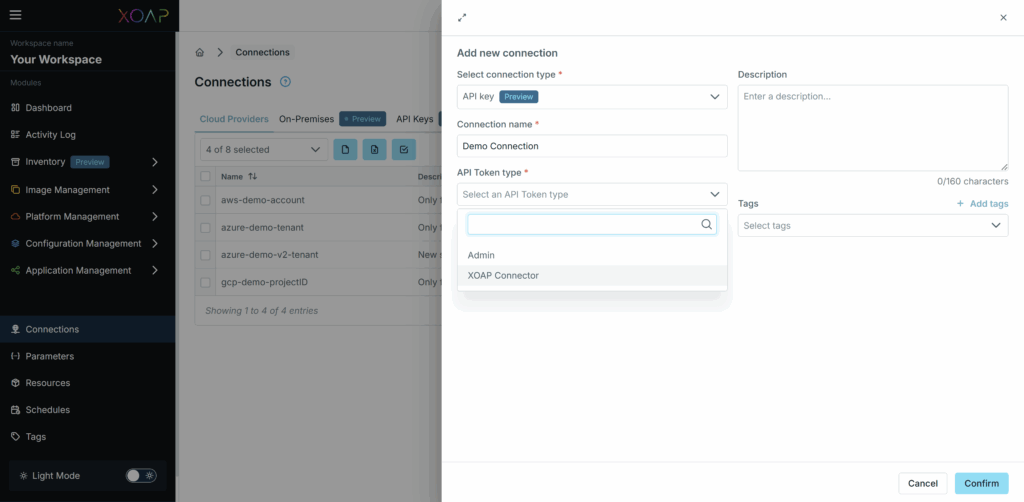
1. In your XOAP workspace, go to Connections and click New Connection.
2. Select API Key as the connection type.
3. Provide a Connection Name and select the API Token Type called “XOAP Connector”.
4. Click Confirm to create a new API key.
You can now copy the key to the clipboard, as you will need it in the next step.
Connect your device #
To run images in your on-premises environment, you need to install the XOAP Connector on a machine that has access to your on-premises infrastructure.
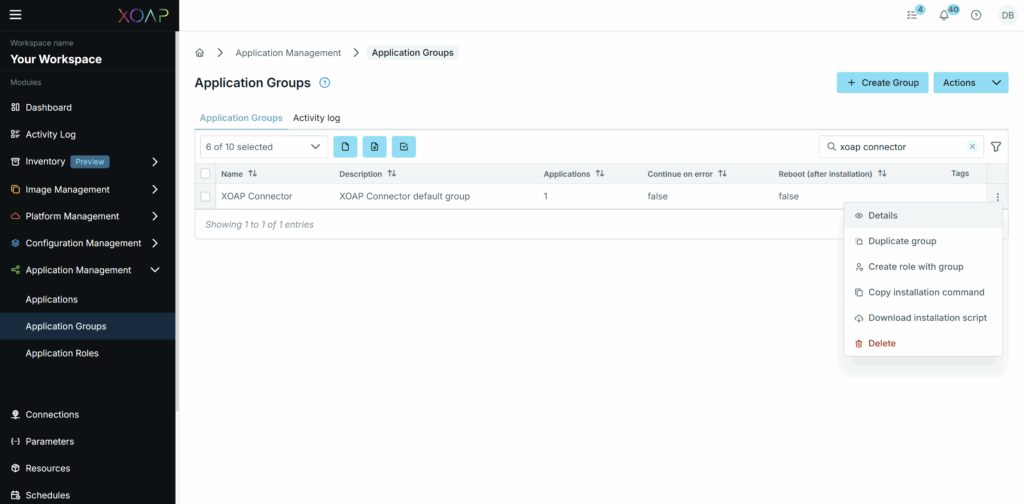
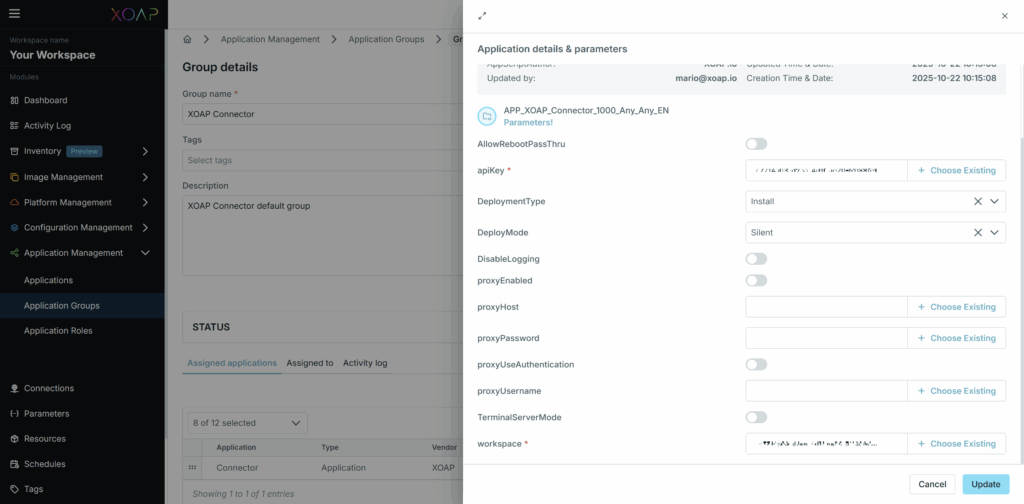
1. In Application Management, go to Application Groups.
2. Find the group XOAP Connector – Base Group and open Details.
3. On the Details page, under Assigned applications, click the Connector application eye icon to view details.
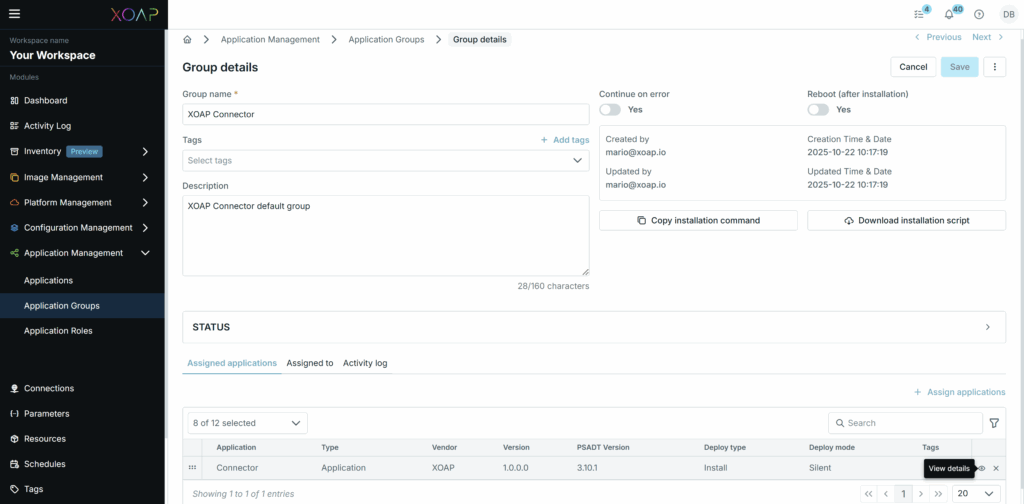
4. Set the apiKey and workspace values and click Update to save the new values to the application group.
- For apiKey, just paste the key you copied to clipboard in the previous step.
- For workspace, the Workspace ID can be found in your Workspace URL.
5. Now, go to Configuration Management → Configuration Groups.
6. Find the XOAP Connector group, click the action menu and select Copy registration command.
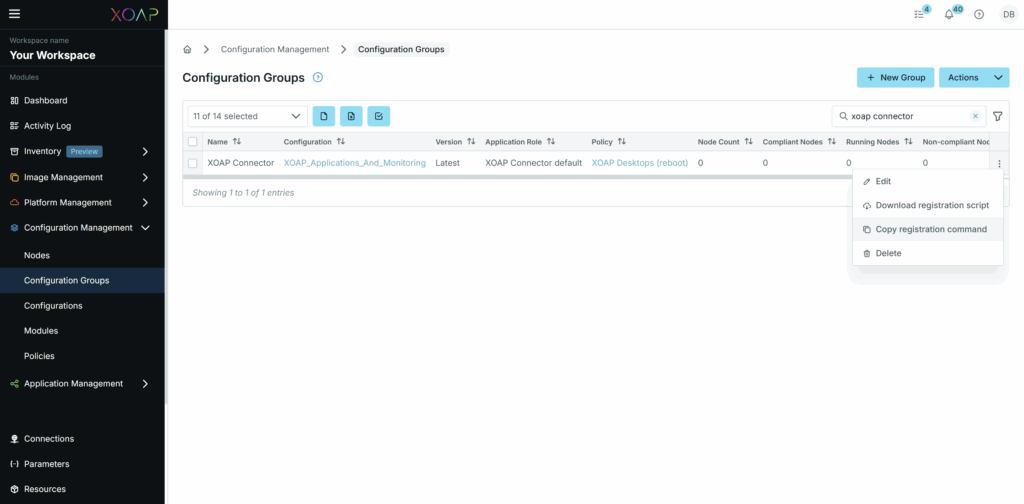
7. Run this command on your device in a PowerShell administrator session.
Once complete, your device will appear under Inventory → Devices in the left-side menu in your XOAP Workspace.
Add operating system #
In the XOAP workspace, Operating Systems is where you define the OS that will serve as the base for deploying your image. For cloud providers, all Marketplace images are available directly in XOAP and you can simply select the one that best fits your needs. For on-premises environments, you must provide the path to the ISO.
To add a new operating system:
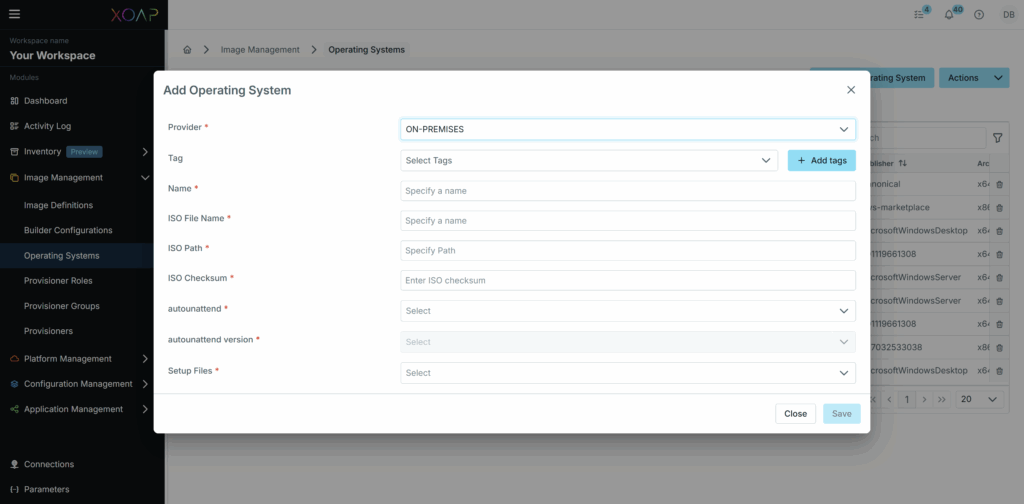
1. Go to Image Management → Operating Systems and click New Operating System.
2. In the New Operating System window, select the On-premises type and fill in the required fields.
3. Click Save to add the new operating system.
If you are missing Setup Files like autonunattend.xml or hypervisor-specific adjustments, upload them to the Resources area, take a look at our GitHub repository or contact us for examples.
Next: Creating an image #
Once your environment, API key, device and operating system are configured, you can create your first machine image. For detailed instructions, you can find the documentation here.