If you’re managing and executing scripts across multiple cloud platforms like Azure, AWS, and Google Cloud, you know how challenging it can be. It often feels like a never-ending cycle of repetitive tasks and inconsistencies, which can be frustrating.
We get it, and we want to help. XOAP’s Scripted Actions feature is here to make your life easier. It allows you to run a single script across various cloud connections, reducing the hassle of managing multiple environments. This means less time spent on repetitive work and more consistency in your operations.
If you’re dealing with these challenges, this quick guide is designed for you! Have a look.
🤔 Want to know what else you can do with Scripted Actions? Find out here: Top 4 use cases for Scripted Actions
How to achieve cross-platform cloud automation with Scripted Actions
First, if you don’t have a XOAP account yet, you can create a free one here.
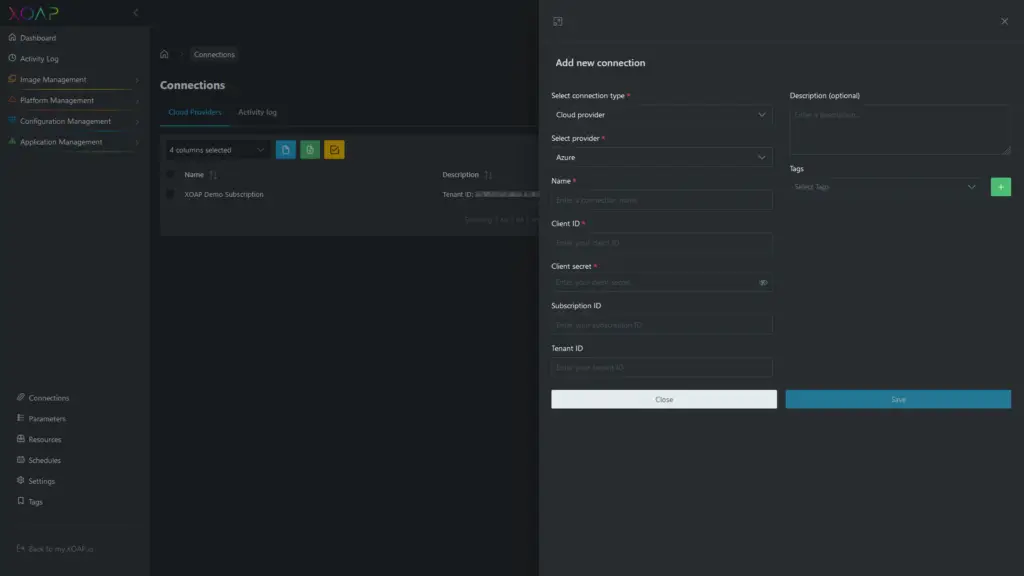
Before creating your scripted action, add cloud provider connections to your Workspace. Go to Connections and then click +.
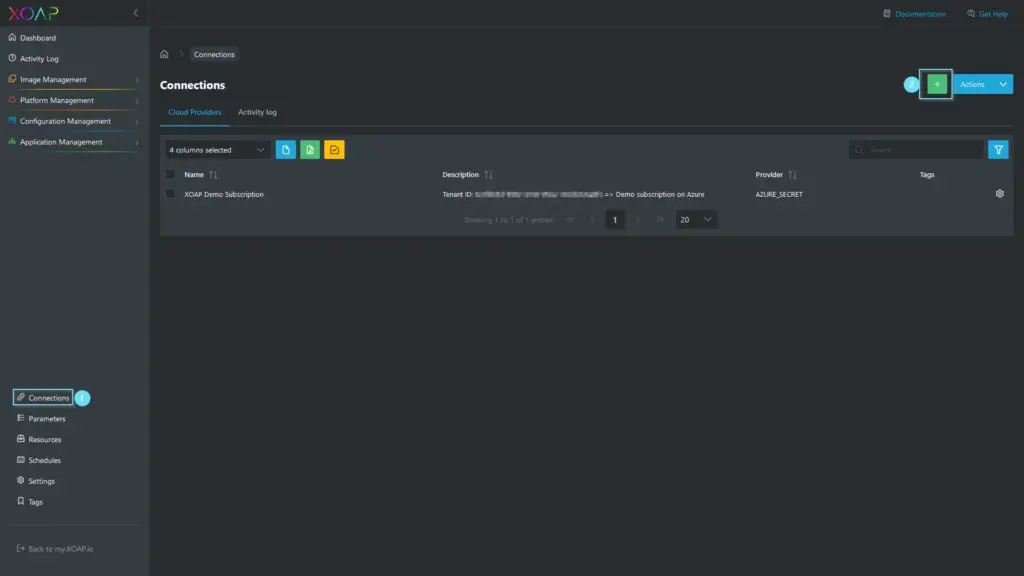
Insert the required data into the connection you want to add.
To know how to add a connection, visit our documentation.
In the next step, you need to upload your PowerShell scripts to the Resources section to use them with the Scripted Action feature. To do that, go to Resources and click +.
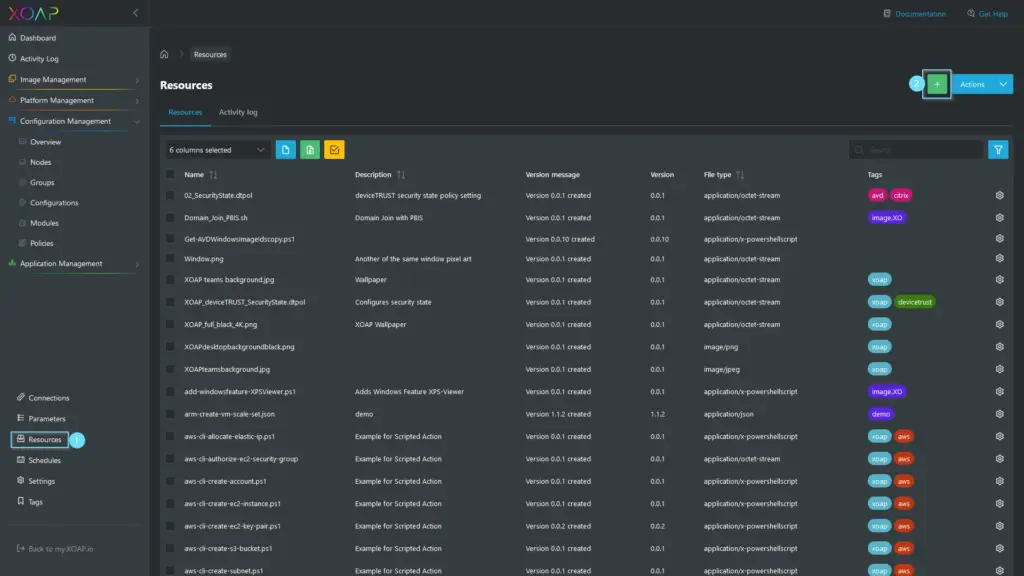
Follow the steps to upload your scripts. For more details about Resources, visit this documentation page.
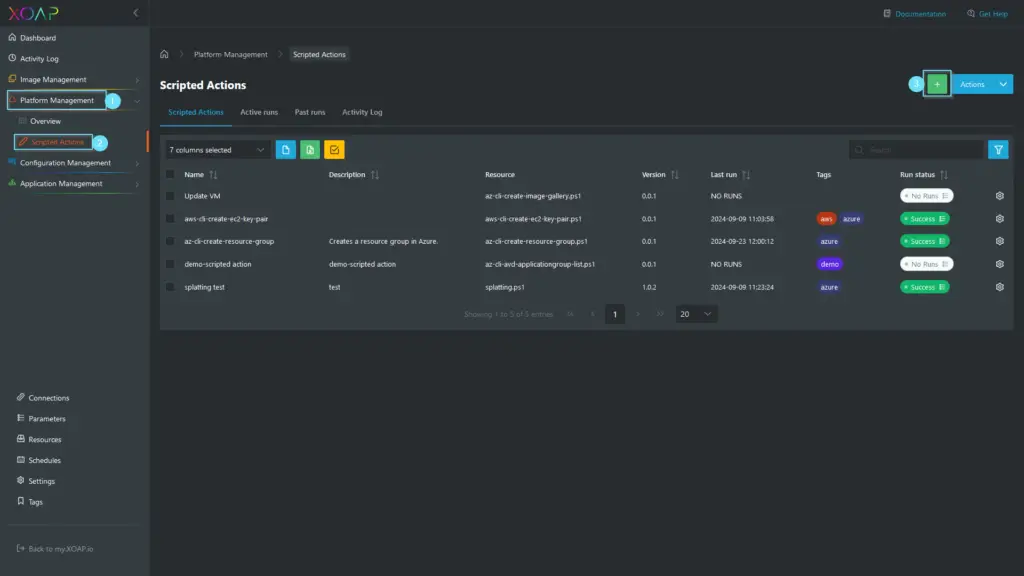
Now you’re ready to create your scripted actions! Navigate to Platform Management and click on the Scripted Actions navigation item. Then click + to create a new scripted action.
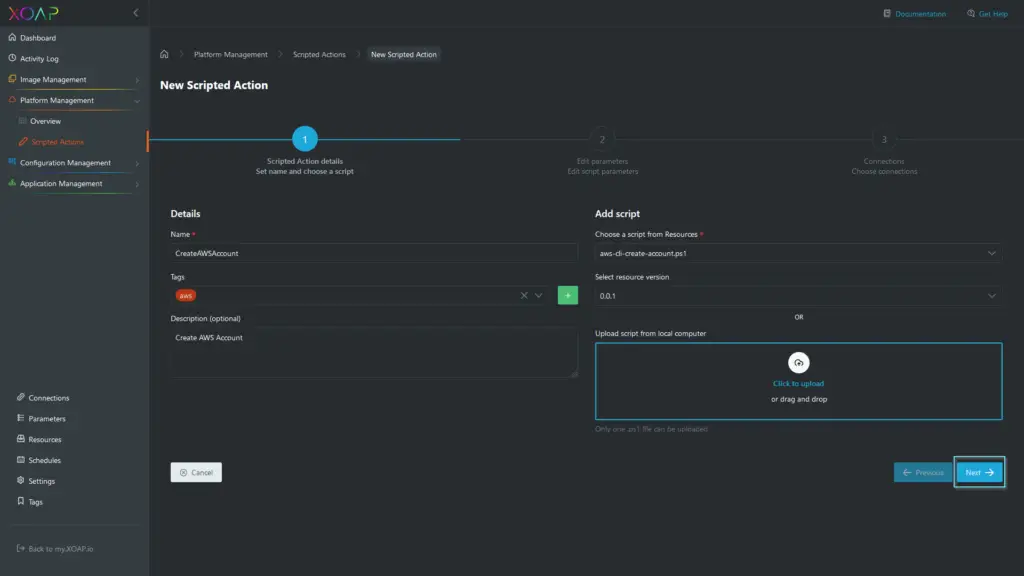
Fill in the Details data, select the script from resources and the specific resource version, and click “Next”.
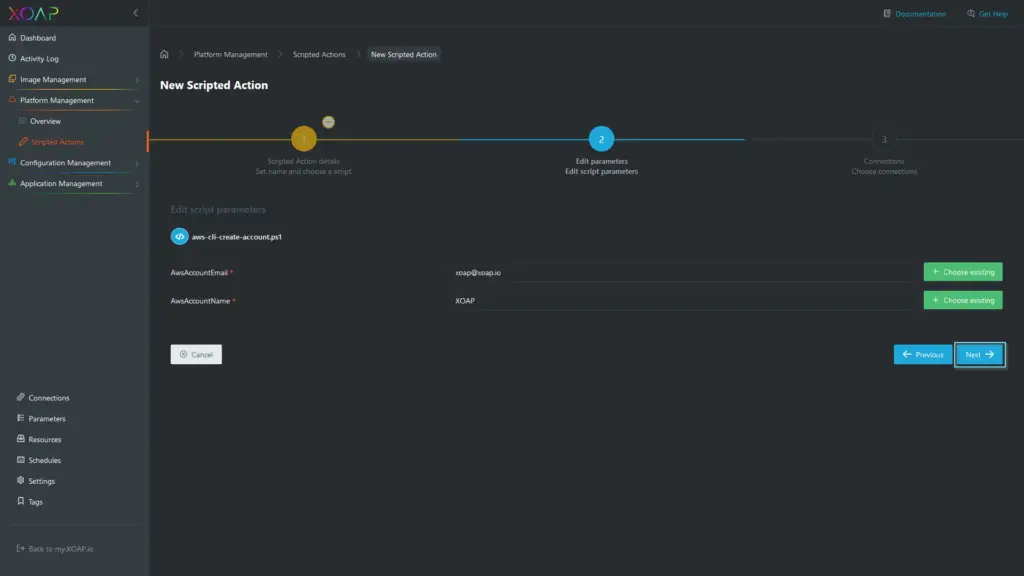
Add script parameters values and click “Next”.
In the Connections step, select the cloud provider(s) you want to run the scripted action on and click “Finish”.

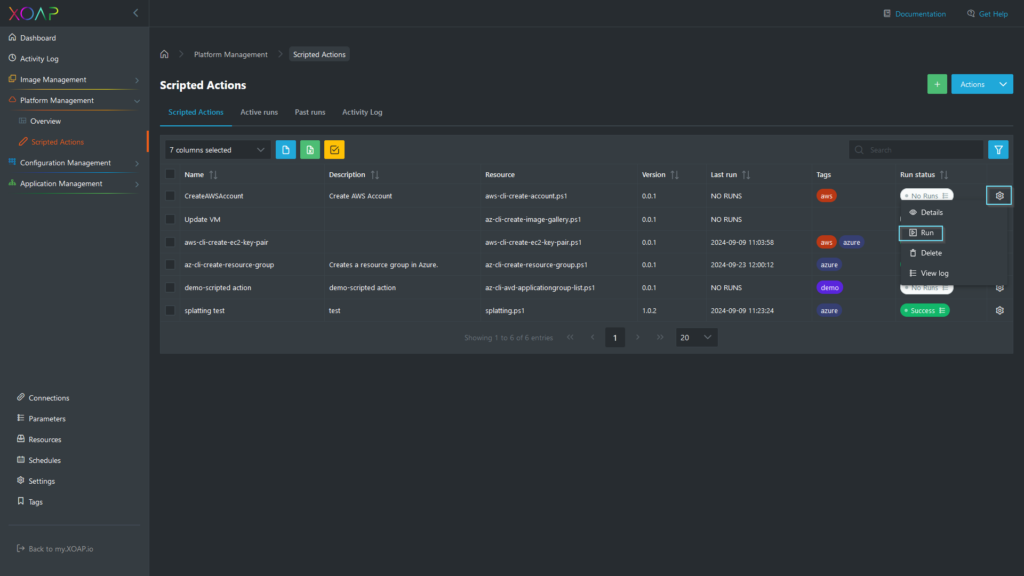
Now the scripted action is ready to be run. Find your scripted action in the Scripted Actions table, click on the action menu and select “Run”.
This will execute the script to all selected cloud provider connections. In this example, the new AWS Account will be created on all selected connections.
If you’d like to schedule the created scripted action, please have a look at the Schedules area in XOAP.
⚠️ Implement cross-platform solutions ASAP
The Scripted Actions feature of the XOAP platform represents a significant advancement in multi-cloud management. From a technical perspective, it simplifies the complexities of operating across diverse cloud environments by allowing a single script to be executed seamlessly on various customer infrastructures. This innovation not only improves operational efficiency but also ensures consistency, reduces the risk of human error, and provides scalability in managing cloud resources.
With Scripted Actions, XOAP empowers technical teams to focus more on innovation and less on repetitive cloud management tasks, thus driving greater productivity and strategic growth.
📌 You may also be interested in:
Scripted Actions documentation
Step-by-step guide to Scripted Actions
Video tutorial: How to create and run Scripted Actions