Table of contents
Struggling with manual and repetitive tasks? Look no further than the powerful Scripted Actions of platform.XO, the latest addition to XOAP.
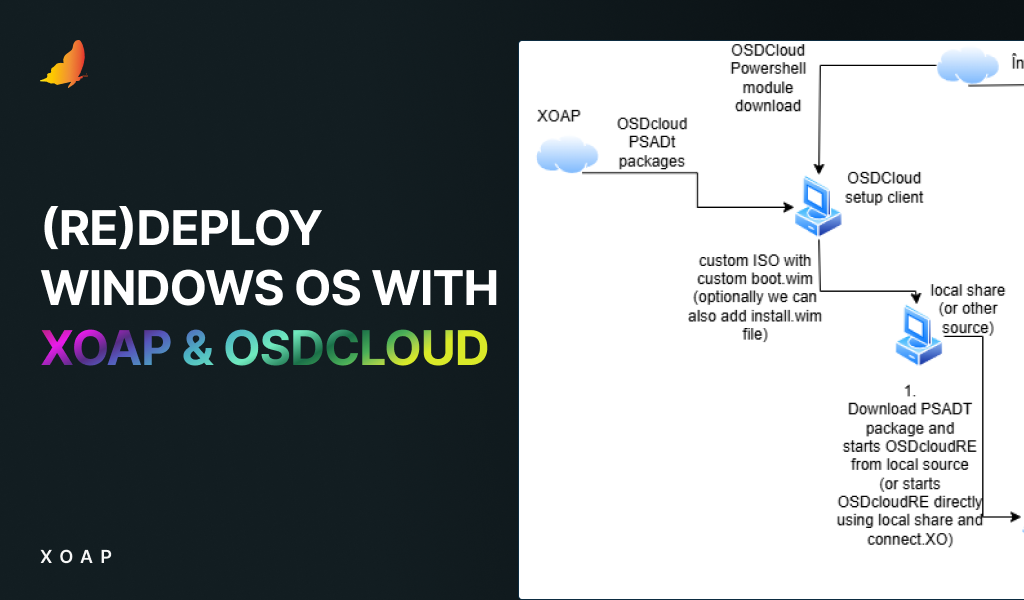
platform.XO (Platform Management) enables you to deploy infrastructure-related components to the cloud provider of your choice. It bridges the gap between image.XO and config.XO.
We currently support PowerShell scripts with Azure CLI, AWS CLI, Azure and AWS PowerShell integration. Soon, we’ll add support for ARM and Bicep deployments and Google CLI integration.
In addition to that, you can take advantage of our centralized Resources area where you store parameter files, complete automation scripts and whatever you might need to deploy your infrastructure components. Also, our Parameters area enables centralized management of all the parameters you need, depending on the cloud provider of your choice.
Sounds good? Then let us show you how to use Scripted Actions right away. 🦾
How to create and run Scripted Actions
Before we begin, create your free account here (if you already haven’t). It has all the modules, configurations and applications integrated, including platform.XO with Scripted Actions.
This tutorial is also available as a YouTube video.
Check out our YouTube channel for more videos like this!
Upload your automation scripts to the central resource area
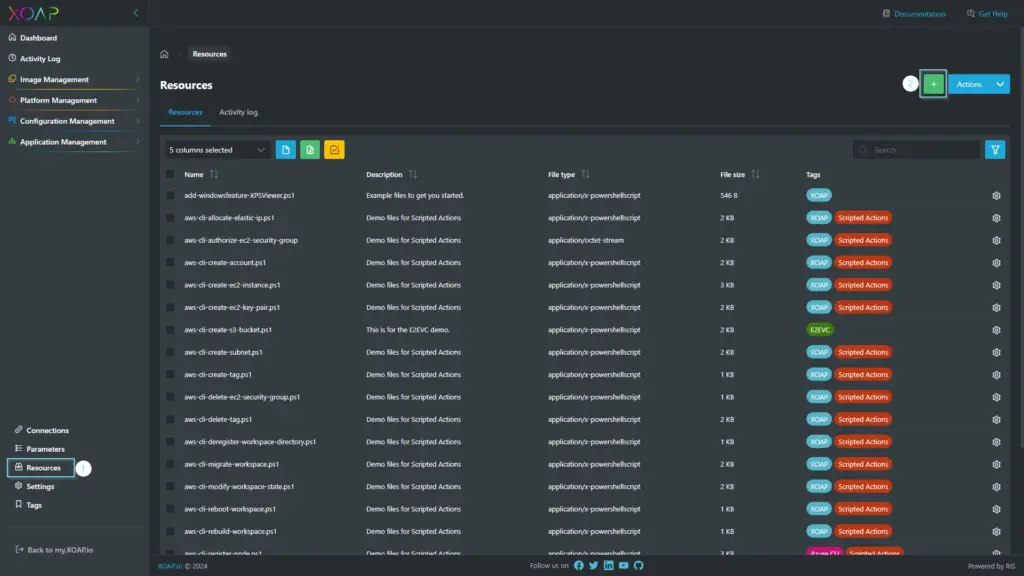
Scripted Actions uses uploaded PowerShell scripts to configure your infrastructure components. The first thing you have to do is to upload your PowerShell scripts to the central resources area.
To do that go to the Resources and click on the green + button to start the upload process. If you currently do not have any scripts ready, you can check on our GitHub repository for scripts that you can use to get you started. You’ll also find a template script you can use to create your own scripts.
Create a new Scripted Action
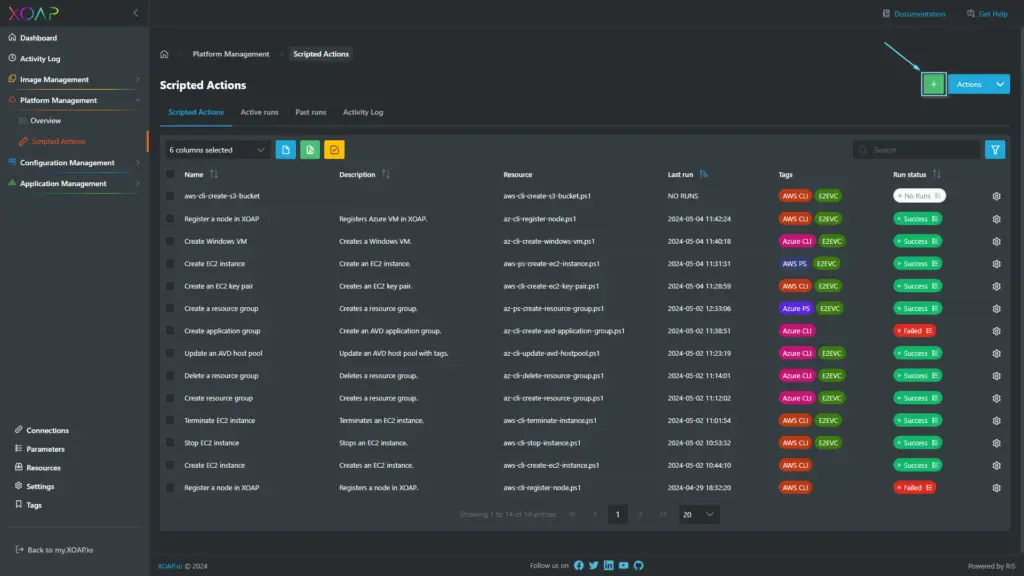
Now that you have uploaded your first scripts, you can create a new Scripted Action. Navigate to Platform Management and then select Scripted Actions.
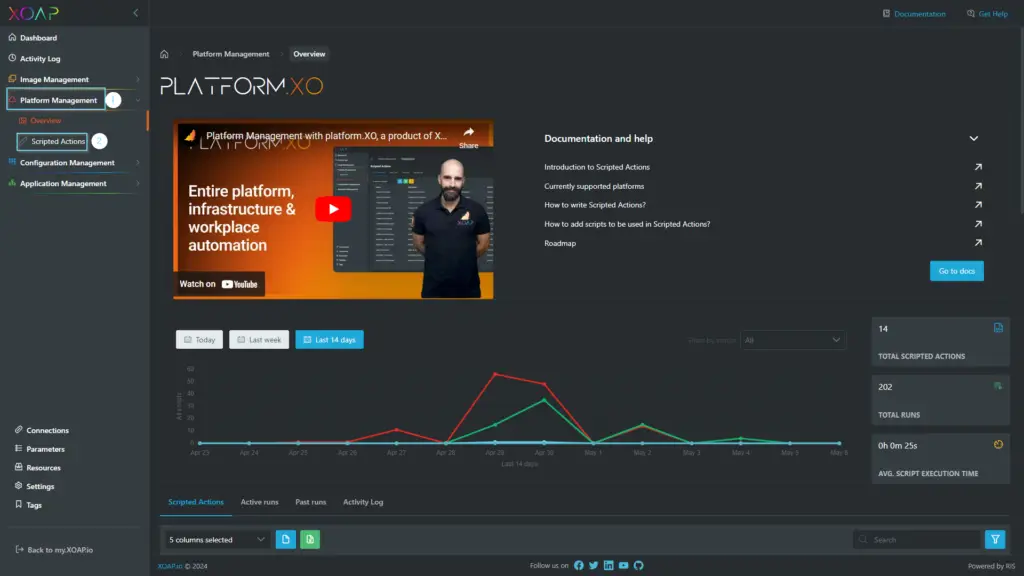
On the Scripted Actions overview click on the green + to create a new Scripted Action.
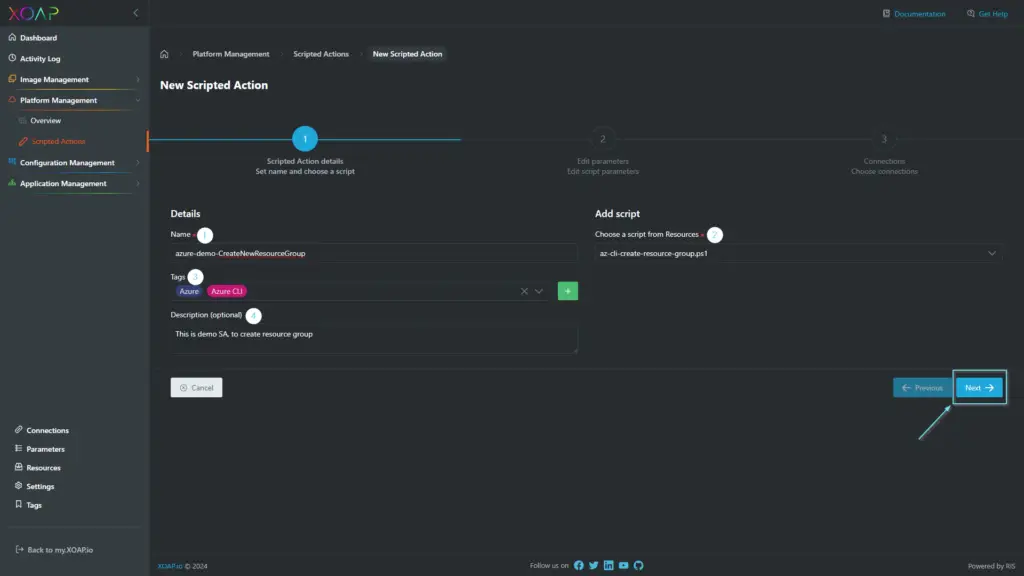
In the “New Scripted Action” window define the Name and then Choose the script you uploaded from Resources. You can also select or create new tags and assign them to your Scripted Action. It is always a good practice to define a Description. When you are ready, click Next.
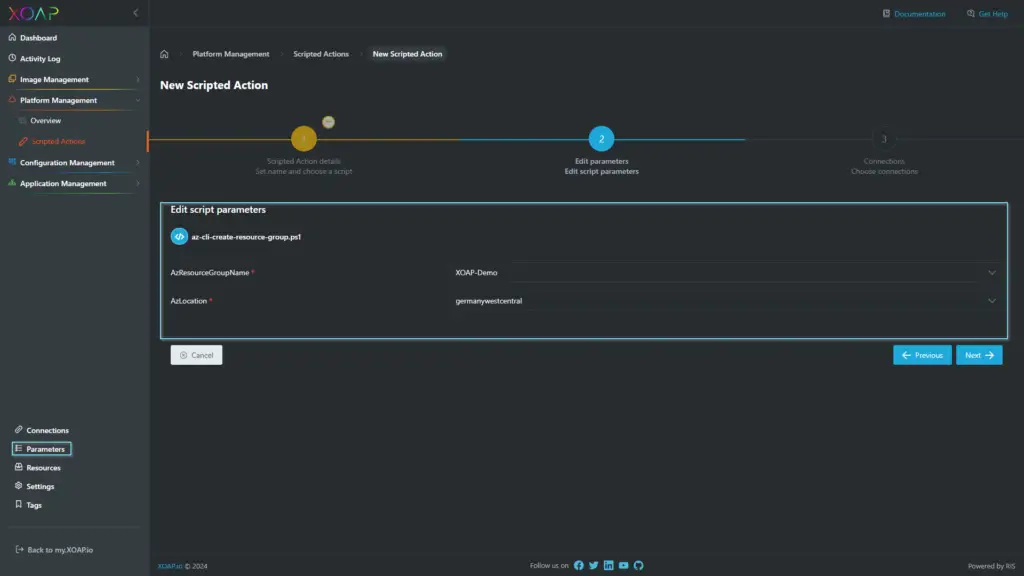
In step number 2 (Edit parameters), you must define the parameters of your script. Many scripts we provide have mandatory parameters that must be filled. You can either add values by directly typing them into the parameter field or by choosing parameters that are defined in our central parameters module. When you are ready, click Next.
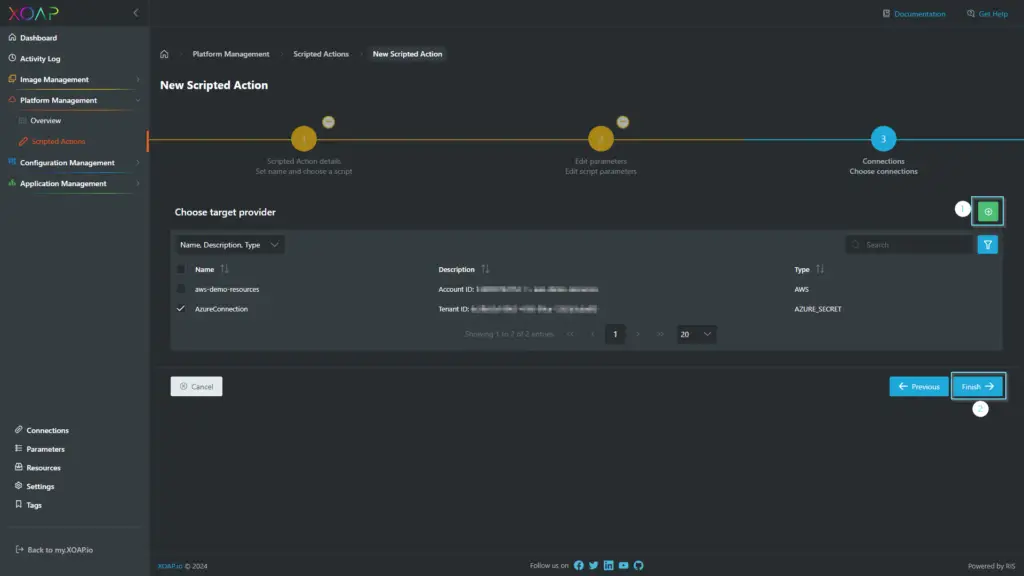
Use the correct connection type based on the script you are using. The credentials are handled in the backend without the need to add additional connection specific information inside the scripts.When you’re ready, click Finish to add your new Scripted Action.
Run a Scripted Action
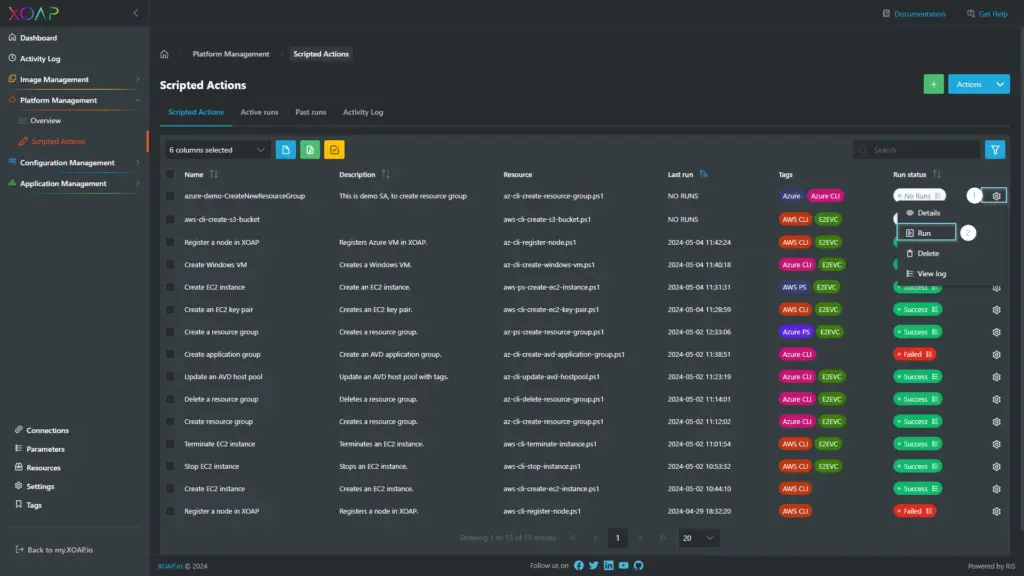
Once created, you can run the Scripted Action from the Scripted Actions overview table. Just click on the Action menu, and select Run. You can also run the Scripted Action from the details page of each action.
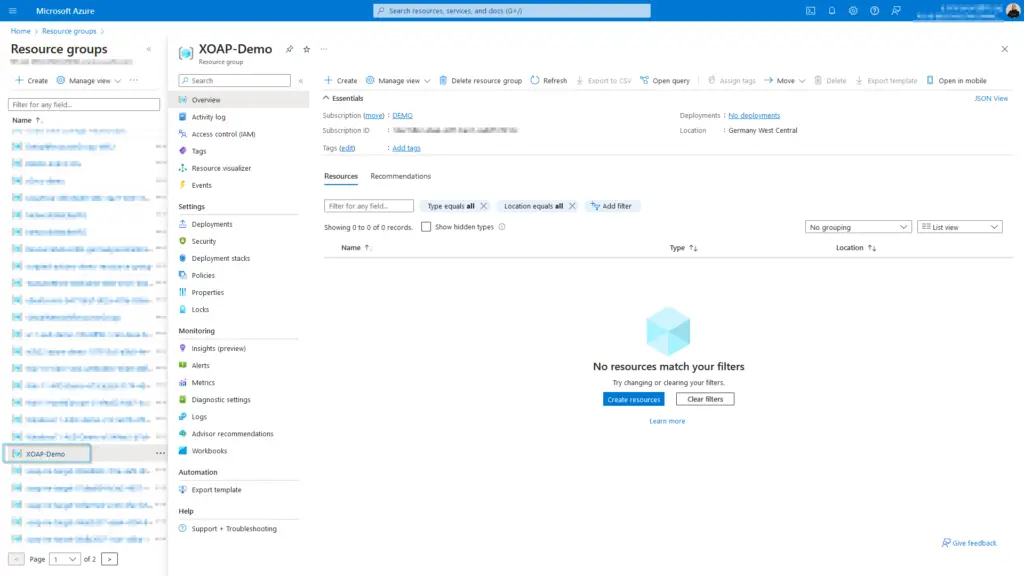
After running the Scripted Action, and in case of a successful run, you should be able to see the results on your cloud provider. In this example, an Azure Resource Group was created.
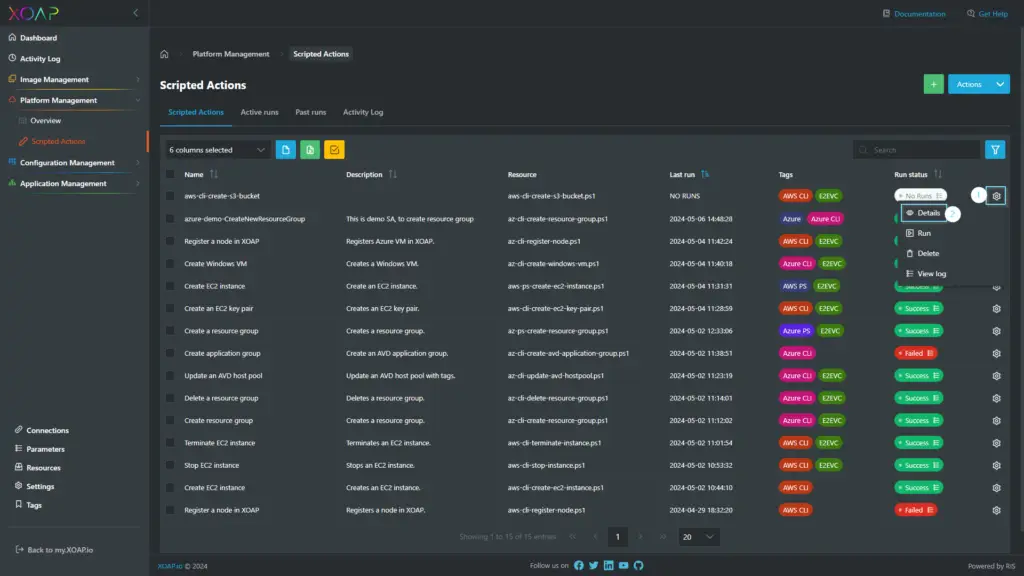
And in XOAP, if you select “View Log” from the action menu or if you click on the status pill, you’ll get a log in a slideout.

Check the details and edit a Scripted Action
If you need to change parameters, adjust the script or change tags, as well as history of specific Scripted Actions, you need to select details in the “Action Menu”.
Make the necessary changes and click Save changes when you’re ready. If you want to delete the scripted action click on the three dots menu and select Delete.

Now it's your turn ⚡️
By following the simple steps above, you can easily create and run Scripted Actions. Try it out! Automate infrastructure deployment on Azure or AWS, use it to deploy virtual machines based on images created with image.XO or run commands inside virtual machines.
Plus, the Scripted Actions feature is just the beginning! It’s only the first part of our new module – platform.XO – with many more exciting things coming soon. We hope this guide has been helpful, but if you need more assistance, you can book a free demo.