If you’re looking for a simple way to deliver customized Azure Virtual Desktop images, this easy-to-follow guide is perfect for you. We’ll show you how to do this without the need for coding. But, before diving into this deeper, we’ll shortly discuss the main points of the solution itself.
🚀 Ready to begin? Click here to immediately go to Step 1
Table of contents
Download AVD templates and scripts
Brief overview of AVD
Azure Virtual Desktop (AVD), is a VDI solution provided by Microsoft. It allows organizations to host and manage virtual desktops and applications in the cloud.
Key aspects of Azure Virtual Desktop
- Virtual Machines (VMs): Leverages Azure VMs to run virtualized instances of Windows desktops. These virtual machines can be customized based on the organization’s needs, supporting different configurations and resource allocations.
- Desktop Virtualization: Employs desktop virtualization technologies to separate the desktop environment from the physical device.
- Remote Access: Provides a remote access solution, enabling users to connect to their virtual desktops and applications over the internet. This is particularly useful for scenarios where employees need to work from different locations.
- User Profiles and Data Management: Supports user profiles and data management to ensure a consistent and personalized experience for users. Profiles and data can be stored centrally to allow for seamless access from different devices.
- Scalability: Organizations can scale their virtual desktop infrastructure up or down based on demand. AVD enables flexible scaling to accommodate varying workloads, ensuring optimal resource utilization.
- Integration with Azure Services: Integrates with other Azure services, such as Entra ID, Azure Security Center, and Azure Monitor. This integration enhances security, compliance, and management capabilities within the virtual desktop environment.
- Multi-Session Windows 10: Includes support for multi-session Windows 10 and 11, allowing multiple users to share a single virtual machine while maintaining individualized desktop sessions.
- Application Virtualization: In addition to desktops, AVD supports the virtualization of applications. This allows organizations to centrally manage and deliver applications to users without the need for local installation.
Azure Virtual Desktop (AVD) provides a comprehensive solution for organizations that want to embrace a virtual desktop infrastructure in the cloud. Additionally, it offers the advantages of flexibility, scalability, and centralized management, which make it suitable for a variety of use cases, such as remote work, collaboration, and efficient utilization of IT resources.
The benefits and drawbacks of using Azure Virtual Desktop Infrastructure are summarized in the table below:
|
Pros
|
Cons
|
|
Integrated with Microsoft 365 This integration enhances productivity by allowing easy access to familiar tools such as Microsoft Office apps, collaboration through Teams, and other productivity features within the virtual desktop environment. |
Challenging initial setup and configuration The initial setup process can be difficult. It requires careful planning and configuration. |
|
Dynamic scaling and resource optimization AVD provides dynamic scaling capabilities. It ensures efficient resource utilization, cost optimization, and the ability to adapt to fluctuating workloads without compromising performance. |
Cost management complexity While AVD offers scalability, managing costs effectively can be intricate. Understanding and optimizing Azure pricing models, managing virtual machine configurations, and monitoring usage to avoid unexpected expenses require ongoing attention, potentially leading to cost-related issues. |
|
Enhanced security features AVD prioritizes security with features such as Azure Entra ID integration, Multi-Factor Authentication (MFA), and compliance with industry standards. This ensures a secure environment for virtual desktops, protecting sensitive data and meeting regulatory requirements. |
Learning curve for admins Administrators might face a learning curve when transitioning to AVD, especially if they are accustomed to traditional on-premises solutions. Navigating the Azure portal, understanding cloud-specific configurations, and troubleshooting issues could require additional training. |
|
Combine Azure Virtual Desktop and Citrix VAaD The combination can offer several benefits for organizations looking to optimize their virtualization infrastructure, like enhanced user experience, resource optimization or management capabilities. |
Automation difficulties Due to the complexity of automating cloud infrastructures and authorizations, as well as infrastructure as code requirements, automating Azure infrastructure is more complicated and requires expertise in both cloud platforms and desktop environments. |
We have to emphasize that one of the biggest challenges of AVD is the correct initial setup and configuration, as well as the ongoing operation of the environment.
Microsoft has made a huge leap in the initial setup but still falls short in managing the additional effort required to run a stable environment. Things can quickly get complex when applying or maintaining different configurations, or installing and managing various application sets and user configurations.
How to easily deploy images for AVD with XOAP
Combining application, configuration, and image management modules, XOAP makes it easy to create, maintain, and deploy images for AVDs without any coding or scripting requirements.
Before we guide you through our step-by-step tutorial, create a free account.
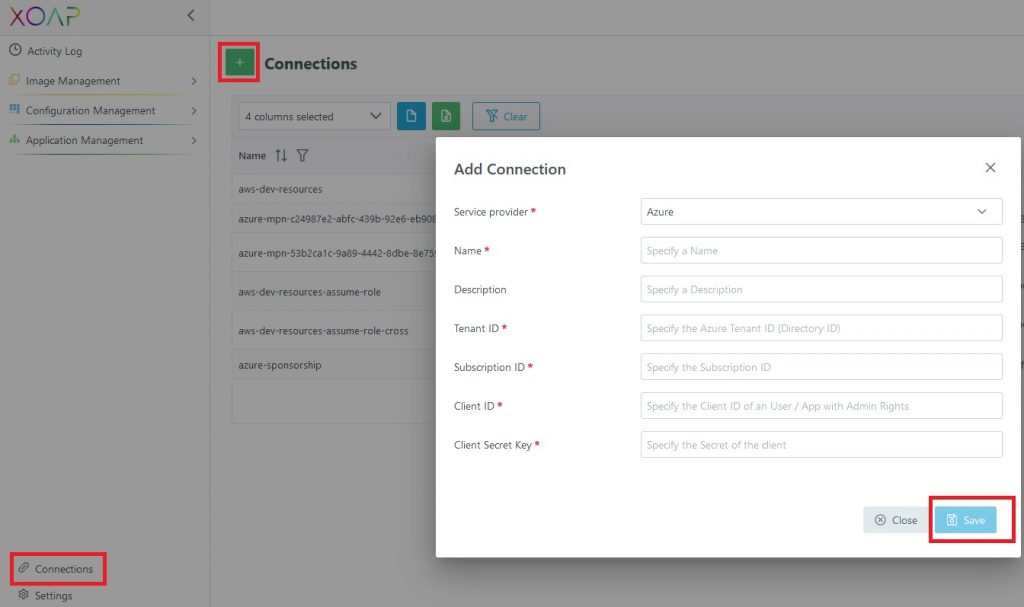
After that, log in to your Workspace and switch to the “Connections” area. Prepare the credentials needed to connect to your Azure tenant:
Tenant ID = TenantId
Subscription ID = SubscriptionId
Client ID = CLientId
Client Key Secret = ClientSecret
This tutorial is also available as a YouTube video.
Check out our YouTube channel for more videos like this!
Step 1
Click on + to add a new connection. Fill in all needed information and click “Save” to add the new connection.
Need more help? Read our documentation or watch this video:
Step 2
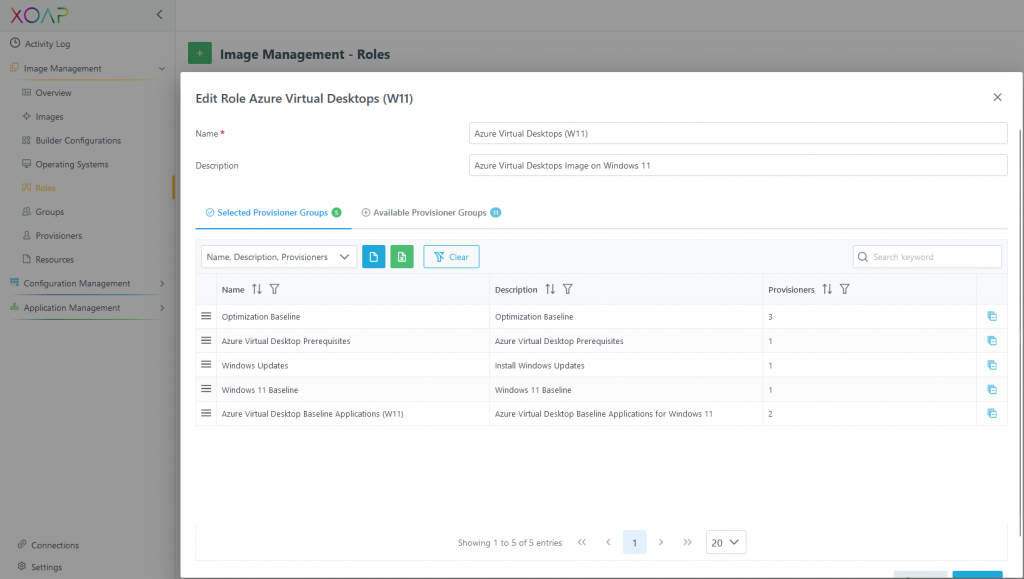
Once the connection is created, you can start with creating images in Image Management.
In your workspace in Image Management, switch to the Roles area, you can find a pre–created role for AVD called Azure Virtual Desktops (W11). In this role, you can find some basic provisioner groups for OS optimization, OS updates, AVD prerequisites, and some applications.
Step 3
In case you need to upload your existing scripts, install different applications, or maybe upload specific files on your AVD image, use the Resources, Provisioners, and Groups area under Image Management to add new resources and create new groups and provisioners.
📄 As always, more information about Image Management and its usage can be found in our documentation hub.
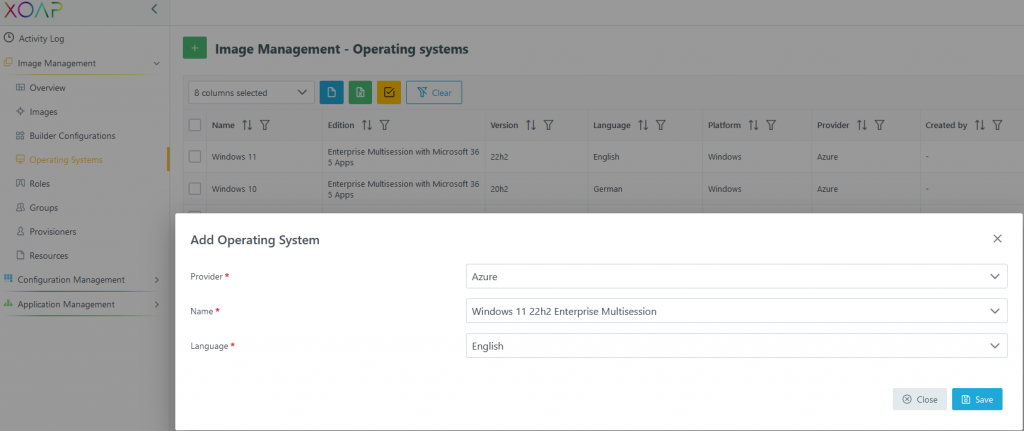
Once your AVD Role is ready go to the Operating System, check if the base operating system you want to use is already in the list. If not, click “+” to add a new OS base image configuration. Fill all the data in the “Add Operating System” window and click “Save”.
Step 4
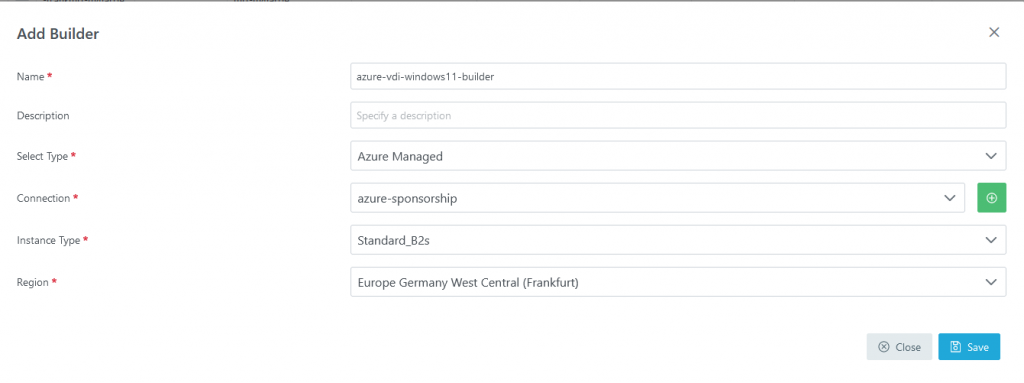
The next step is the configuration of the Builder Configurations. Go to Builder Configurations and click “+” to add a new “Builder Configuration”. Fill all the necessary data in the “Add Builder” window with your values.
Step 5
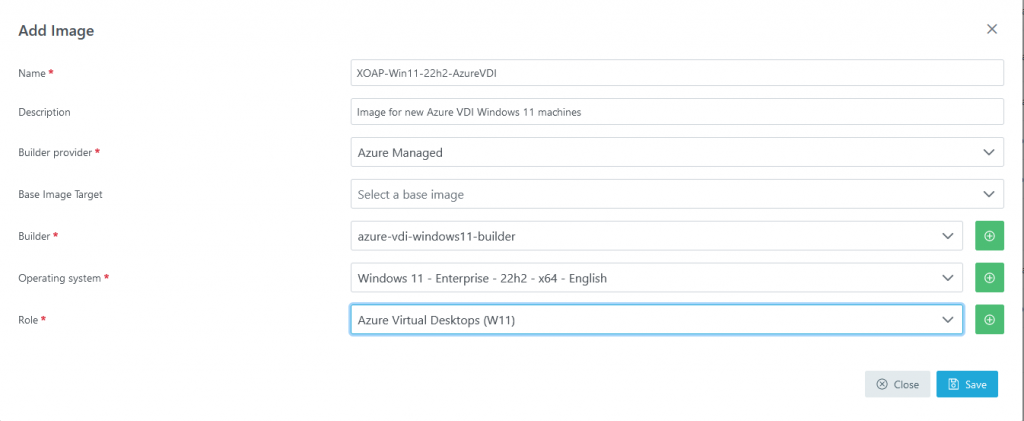
The last step before your first image run is to add the image configuration with all the previous options. Go to the Images under Image Management, and click “+” to add an image.
In the “Add Image” window specify the required and desired information. Then click “Save” when you are done.
Step 6
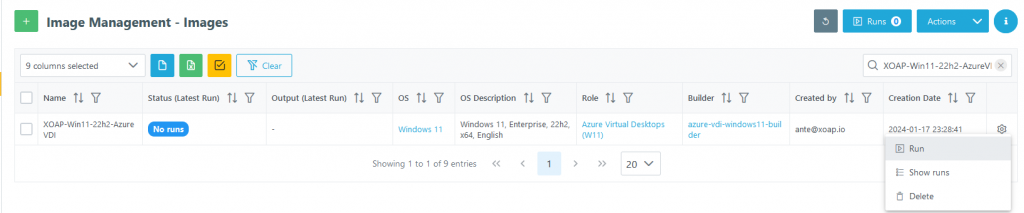
Now you are ready to run the image creation. Click on the gear icon and choose “Run”.
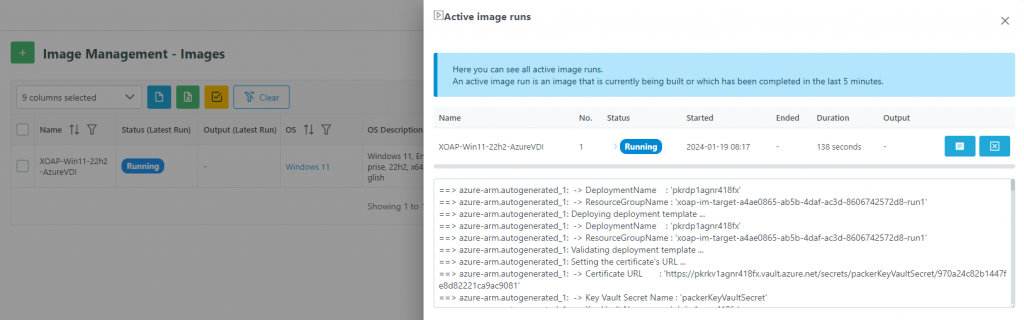
Step 7
Depending on the number of configurations, reboots, Windows Updates and applications, this can take a while. Follow the building process by hitting the “Runs” button.
Step 8
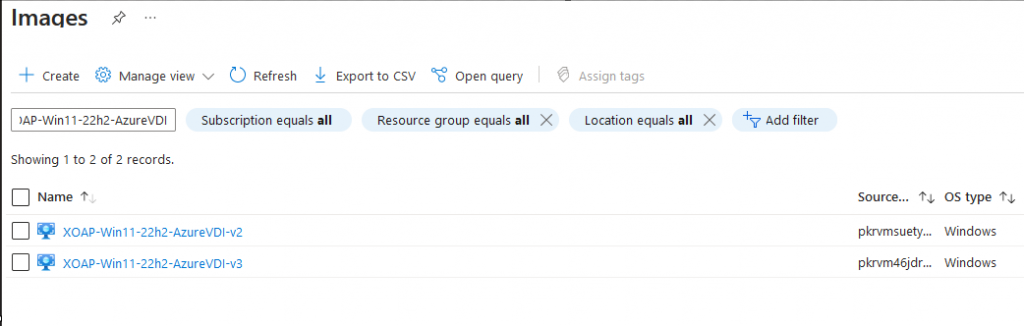
Once the run is finished, the image will be added to your Azure subscription, and you’ll be ready to create a new Host Pool in your Azure infrastructure. You’ll see that every image run creates a new versioned image so you can identify which image was created last.
Conclusion
Ultimately, automating the image creation for Azure Virtual Desktops offers several advantages over manual processes. Here are some key takeaways:
|
Advantages of automating image creation for AVD
|
|
|
Consistency and standardization
|
Each virtual desktop image is created using the same predefined configurations, settings, and software.
Consistency eliminates variations that can arise from manual processes, leading to a standardized and reliable environment. |
|
Time and cost efficiency
|
It reduces the time required to set up virtual desktops and eliminates repetitive manual tasks, allowing IT teams to allocate their time more efficiently. This, in turn, leads to cost savings by optimizing resource utilization. |
| Rapid deployment and scaling |
It enables quick and scalable deployment of virtual desktops. As demand for VDI resources fluctuates, automated image creation allows organizations to rapidly scale up or down without the need for extensive manual intervention. |
| Reduced human errors |
Manual image creation is prone to human errors, such as misconfigurations or overlooked settings. Automation minimizes the risk of errors, enhancing the overall reliability and stability of the virtual desktop environment. |
| Version control and rollback |
Automated processes facilitate version control for virtual desktop images. If issues arise after an update, automation allows for easy rollback to a previous, known-working version, ensuring system stability and minimizing downtime. |
| Compliance and security |
It helps enforce security policies and compliance standards consistently across all virtual desktop instances. IT administrators can integrate security measures and updates into the automated process, reducing the likelihood of vulnerabilities. |
| Auditability and documentation |
Automated image creation processes provide a clear audit trail of changes made to virtual desktop configurations. Documentation can be invaluable for compliance audits, troubleshooting, and understanding the evolution of the virtual desktop environment over time. |
| Enhanced agility and flexibility |
It allows IT teams to adapt quickly to changing requirements and technologies. New software or updates can be easily integrated into the image creation process, allowing organizations to stay agile and responsive to evolving business needs. |
To automate image creations for your Virtual Desktop Infrastructure, it’s best to use a powerful robust tool like XOAP. All OS configuration, optimization and application installations do not require any coding skills.
Plus, the same resources or provisioners that you used for VDI images can be reused for your other use cases. And not just on Azure – the same provisioners can be used in your AWS infrastructure. Therefore, consistency of OS configuration can be achieved on cross-platform infrastructure.
⚡ Have more questions about XOAP and AVD? Book a 30-minute demo to see how it all works!

Download AVD templates
for a simple, reproducible and fast delivery of your Azure Virtual Desktop images.