Want to easily automate and quickly deploy a ControlUp test environment or Proof of Concept (PoC)? Then welcome to our guide! 🎯
There is no need for any packaging knowledge or understanding of XOAP! We provide all the templates and best practices from a single source.
Table of contents
Quick start in ControlUp
ControlUp is a software platform designed for monitoring, managing and troubleshooting virtual desktop infrastructure (VDI) and server environments. It provides IT administrators with real-time insights and tools to optimize the performance and efficiency of their virtualized infrastructure.
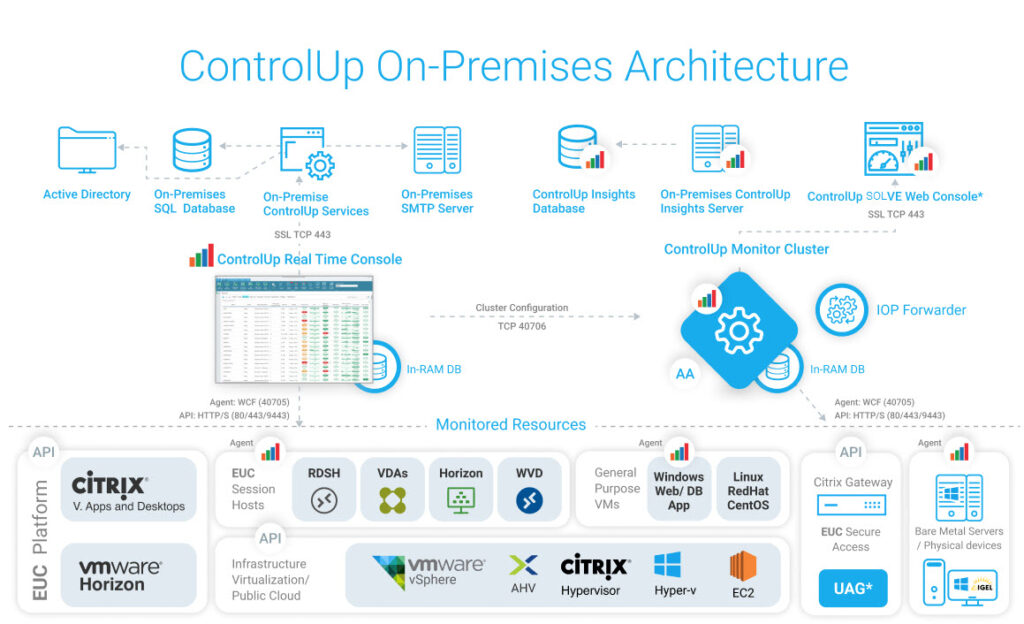
The following illustration will help you to get an overview of ControlUp, which components are required and which are used. We focus on the following architecture components in the provision of the PoC / test environment:
- ControlUp Insights On-Premises Server (IOP);
- ControlUp SOLVE On-Premises Web Console (SOP); and
- ControlUp Agent.
For a Proof of Concept (POC) installation with 500 users, you can consolidate both roles onto a single machine. Due to our automation of the installation and delivery process, you can also start with multiple server systems.
Quick facts:
ControlUp Server | ControlUp Console | |
|---|---|---|
Operating system | Windows Server supported versions: 2022, 2019, 2016 | Windows Server supported versions: 2022, 2019, 2016 OR Windows 11, 10 |
System definition | min. 2 CPUs 8GB RAM 10 GB disk | min. 2 CPUs 8GB RAM 10 GB disk |
Others | NET Framework 4.8 or later PowerShell 5.x or later | NET Framework 4.5 or later |
Create an AD group for users requiring access to the ControlUp real-time console.
Allow the following ports through any firewalls:
ControlUp Console <-> ControlUp Agent: port tcp\40705
ControlUp Console <-> ControlUp Monitor: port tcp\40706
Create a Service Account with the following rights:
Hypervisor: Read-only
Connectivity to Servers/VDI/RDSH: Local admin
Connection to Horizon: Read-only
Connection to Citrix Broker: Read-only
Connection to NetScaler: Read-only
If you plan to set up notifications and alerts based on KPIs, an internal SMTP server with a username, password, and port is required.
To deploy the ControlUp agent and understand its requirements, refer to the following resources:
- Edge DX Agent Distribution and Installation
- How to Deploy the Agent on Your Master Image for PVS/MCS Linked Instant Clones
By adhering to these guidelines, you’ll pave the way for a well-optimized ControlUp environment, ensuring a smooth experience for both administrators and end-users.
Need more help? Read the official ControlUp documentation and implementation requirements.
4 steps for an automated ControlUp delivery
Use the predefined templates and best practices to deploy a standardized ControlUp On-Premises infrastructure.
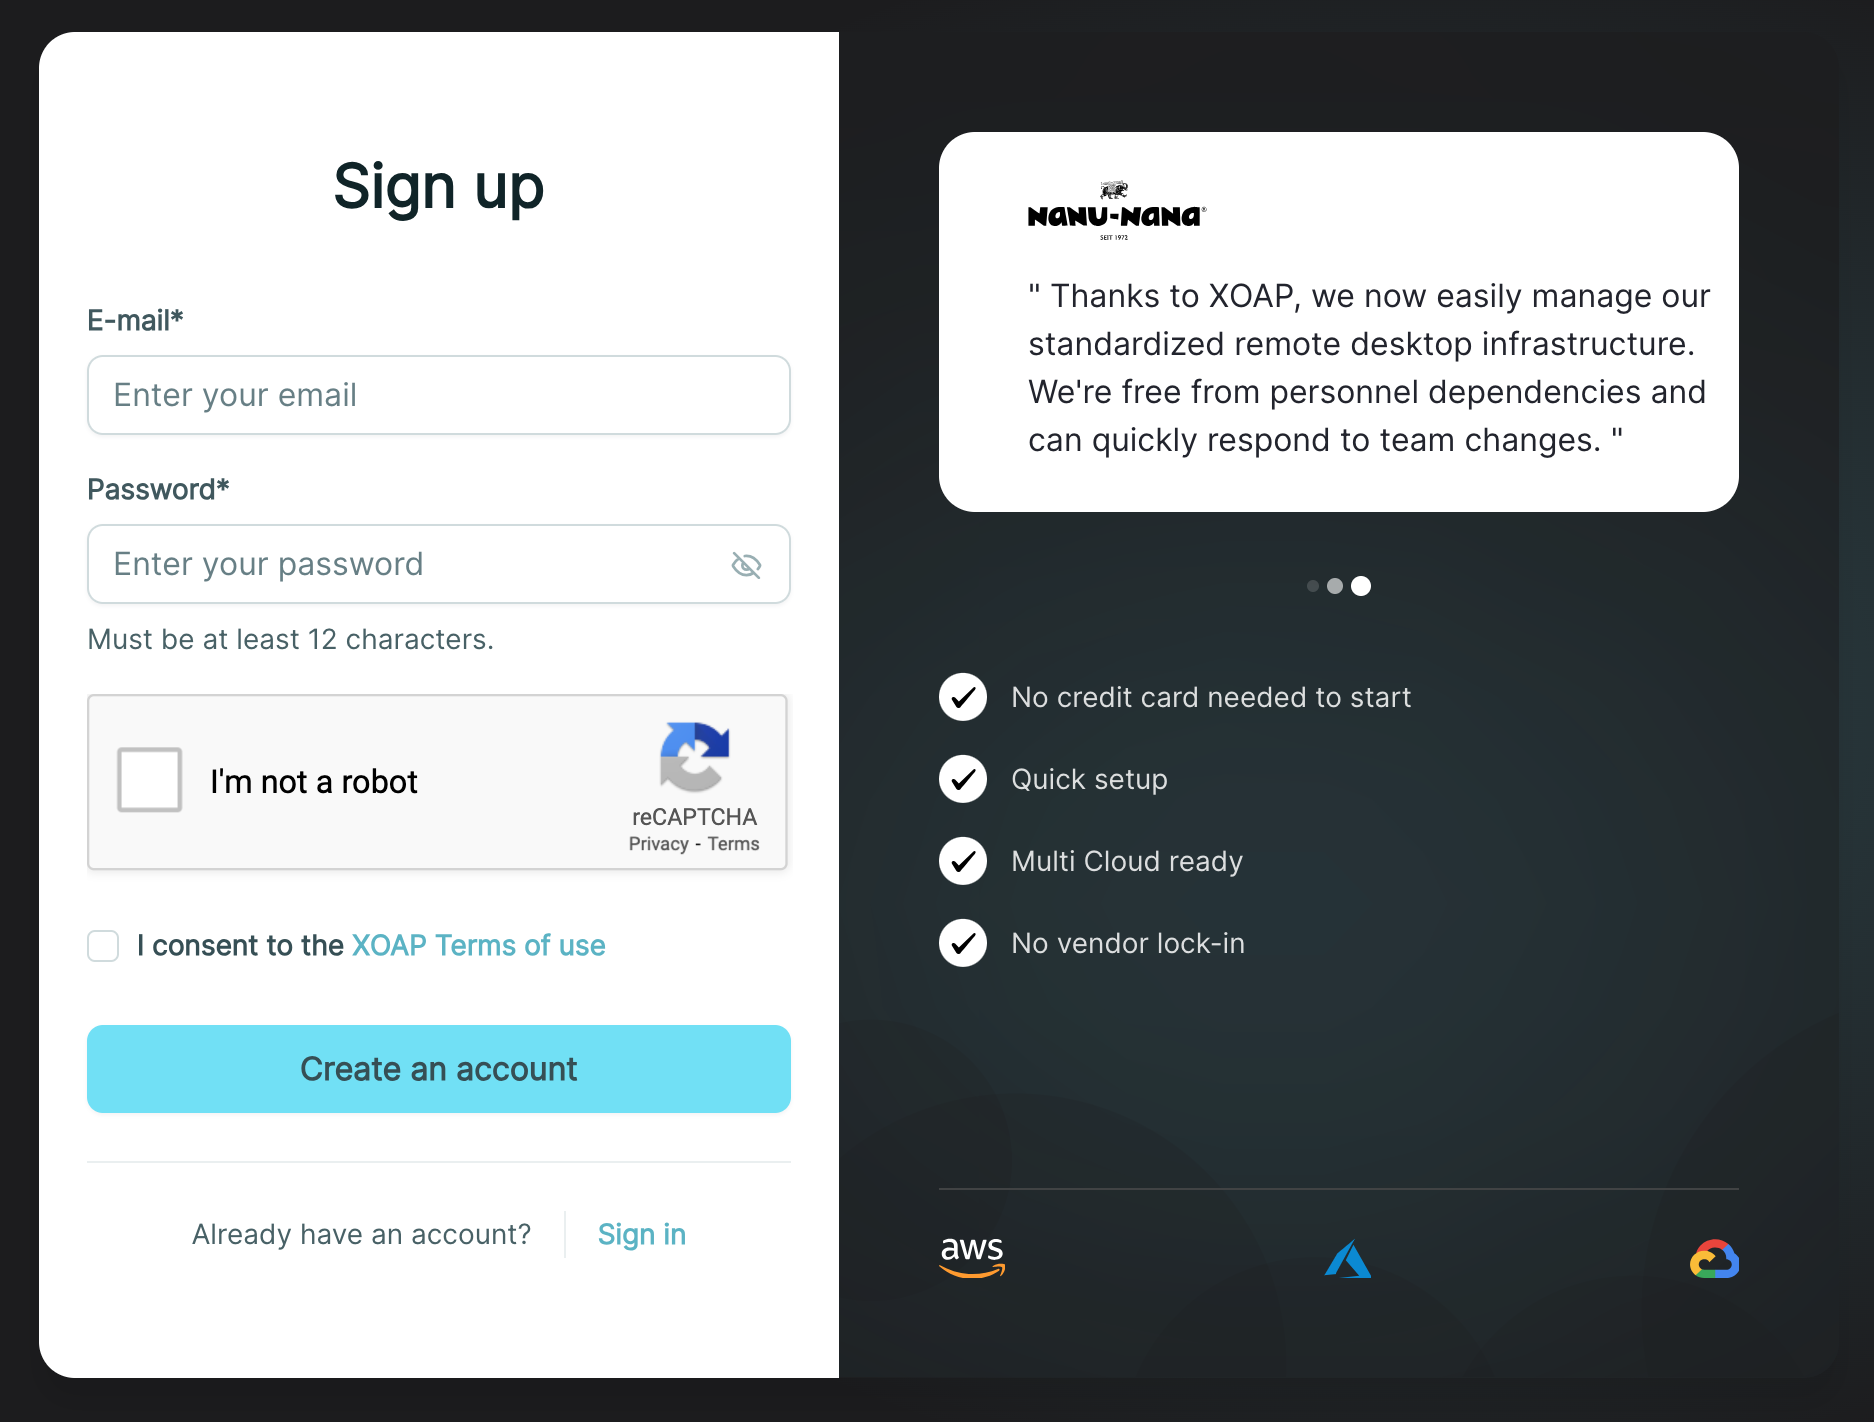
Step 1: Create your XOAP account
Create your free XOAP account. Access all software installation packages and templates.
It includes all the module configurations and applications needed for this example.
Step 2: Customization
Once your XOAP workspace is ready, go to Groups in Application Management. If you search for ControlUp groups, you will find four of them.
It’s important that you edit the ControlAgent Agent installation parameters. The parameters that must be edited are:
- DeviceRegistrationCode
- TenantName
To do this, click on the “ControlUp Agent” group Action Menu and select Edit.
In the edit group window, expand application parameters, set the needed values and save the application installation parameters and group changes by clicking on the Save buttons.
Use the predefined server roles to deploy all ControlUp Server components and prerequisites at the push of a button. Customize the roles to your needs.
In Application Management, you will find the roles that contain the complete installation sequence. The software packages are provided in the correct order and dependency.
You can easily change versions and extend groups at any time.


Step 3: Deployment
Once saved, you are ready to push the ControlUp agent and console to your servers.
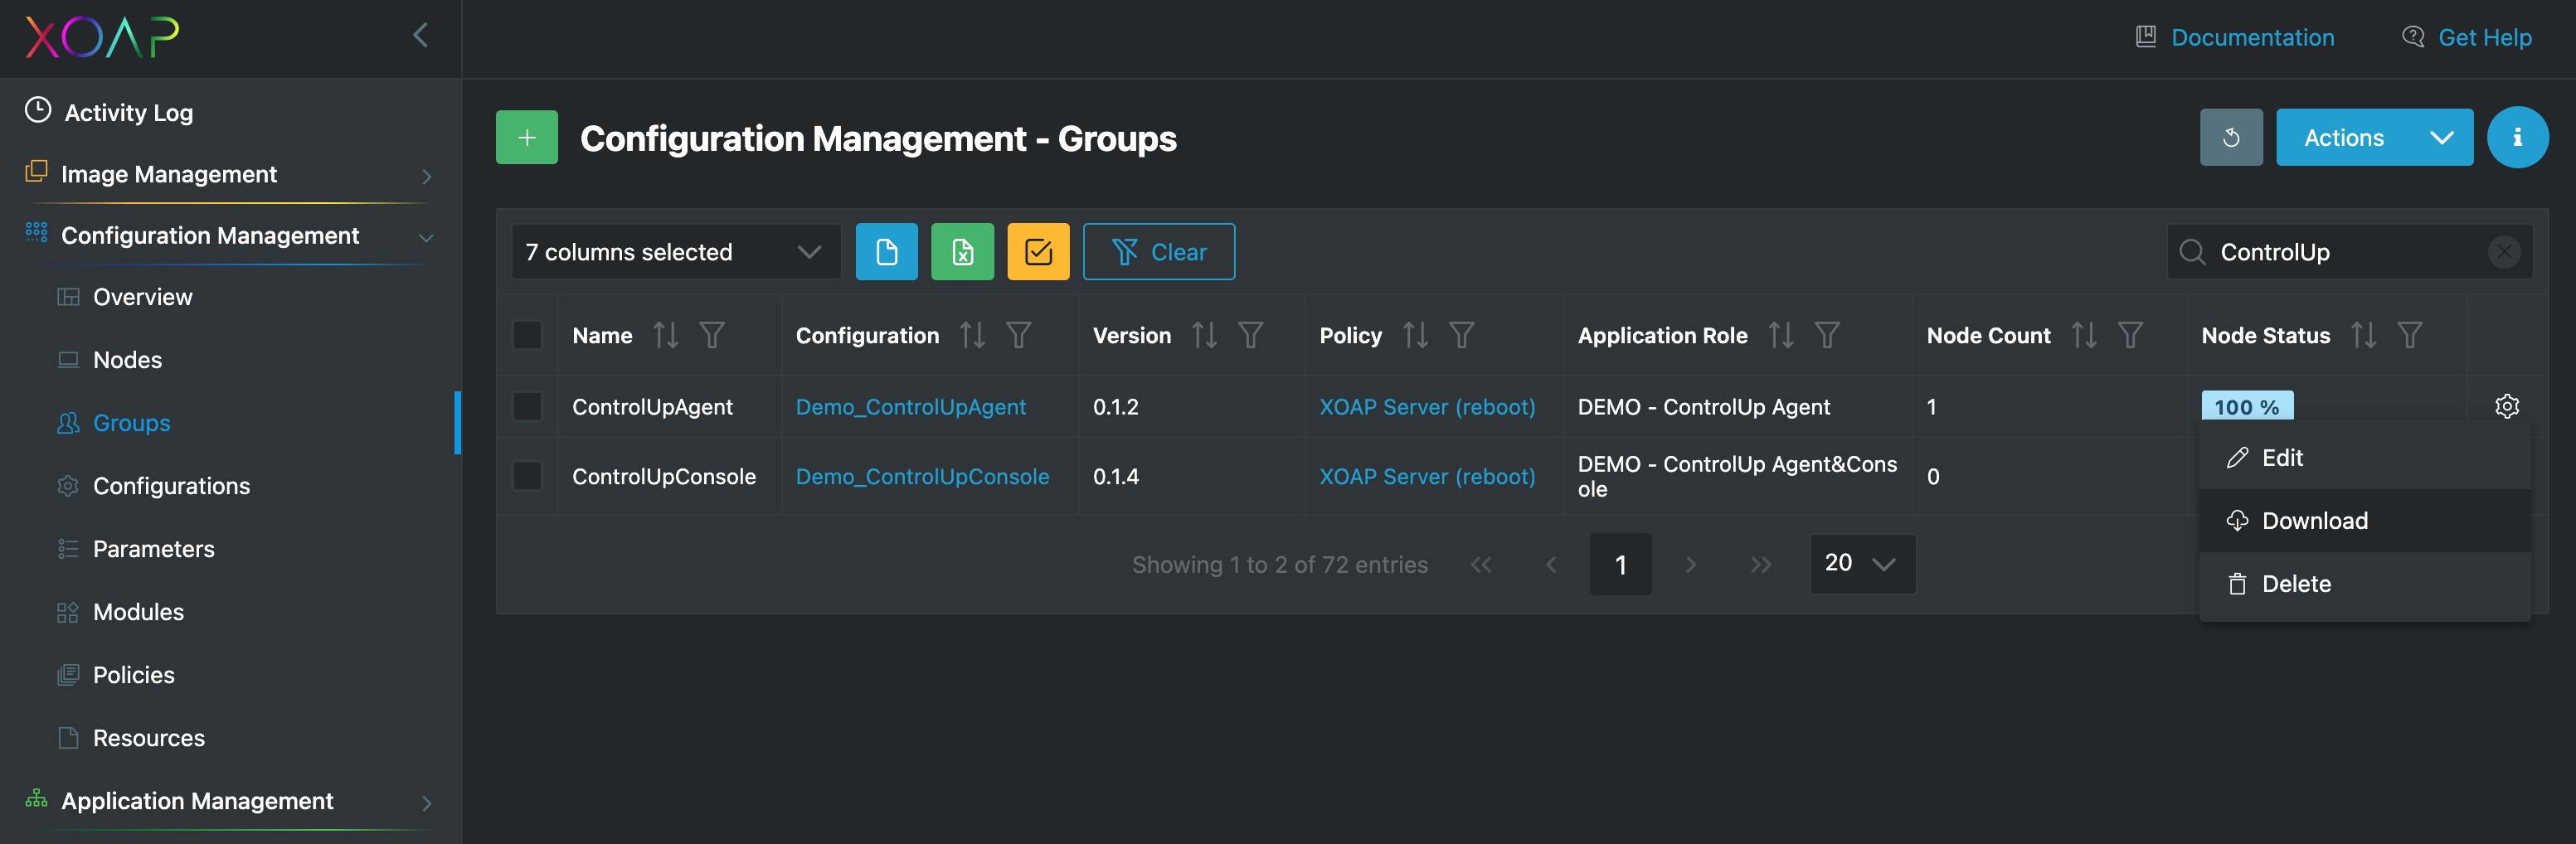
To do this, go to the Groups tab in Configuration Management, find the ControlUpConsole and ControlUpAgent config groups, and download the registration script.
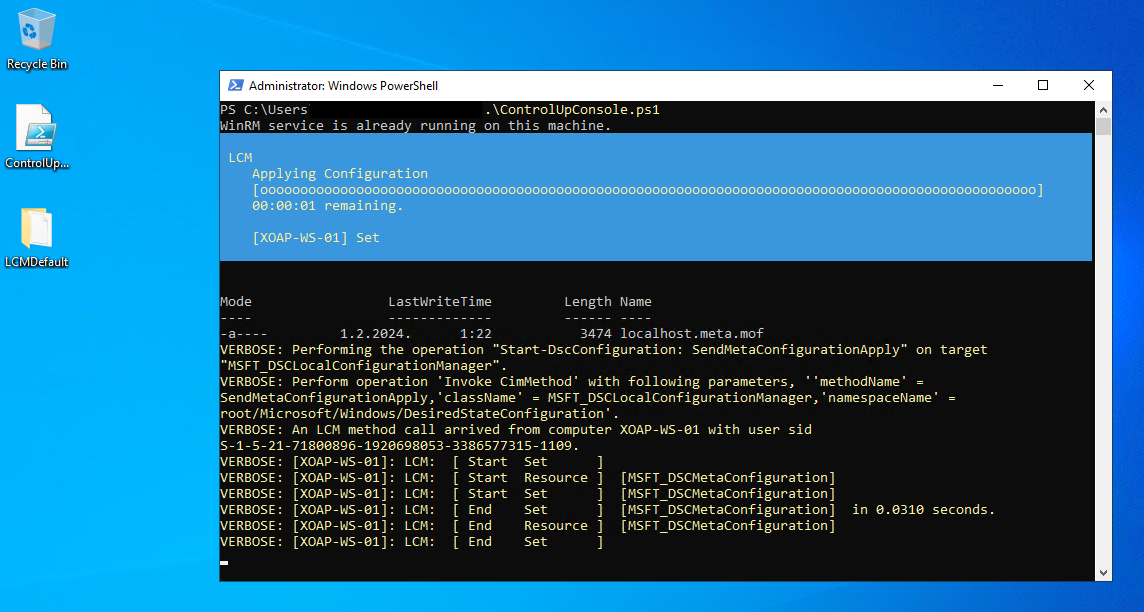
To apply the configuration on the server, copy the registration script to the desired server, open PowerShell as an administrator, and run it.
Download the corresponding group in Configuration Management and simply run the script on your target system. It will appear in XOAP within a few minutes.
Note: Set the execution policy to remote-signed.
Step 4: Finish
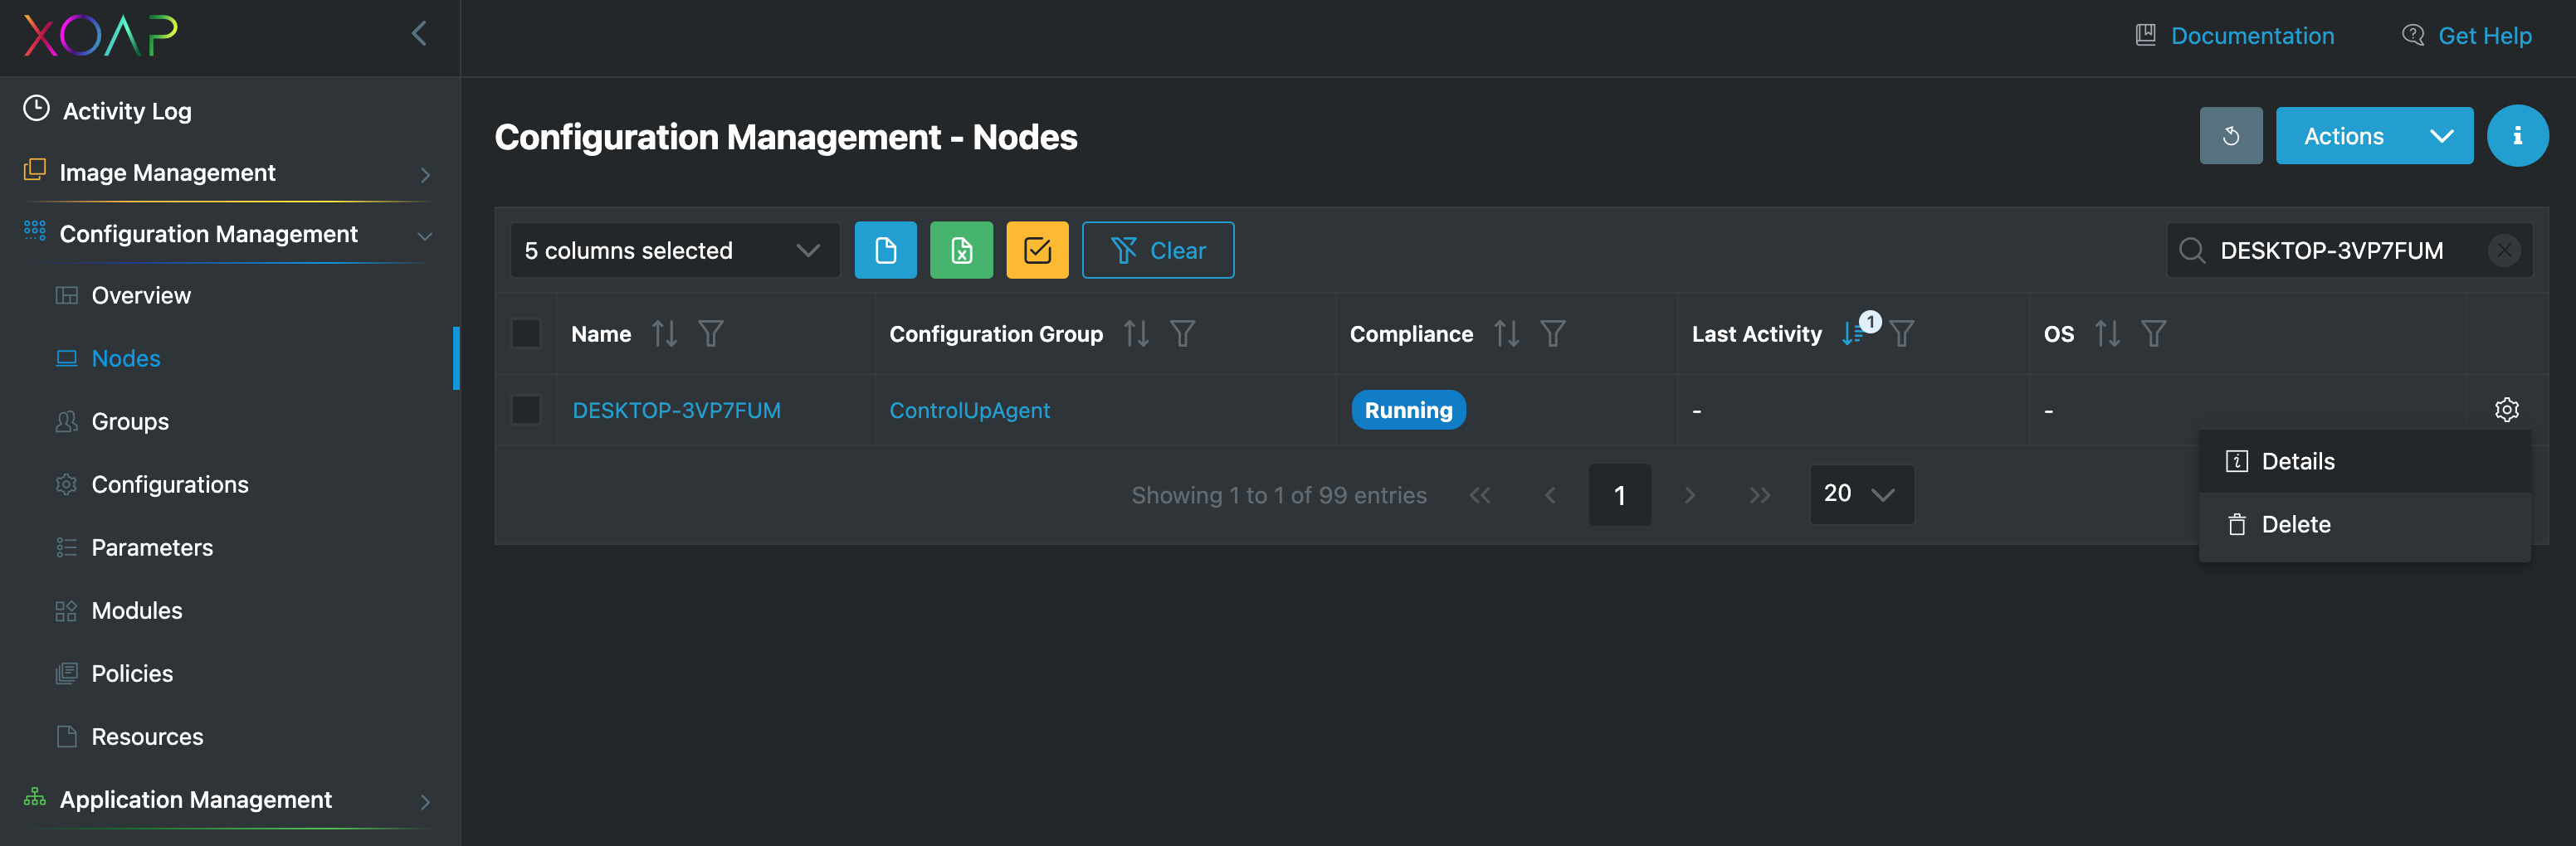
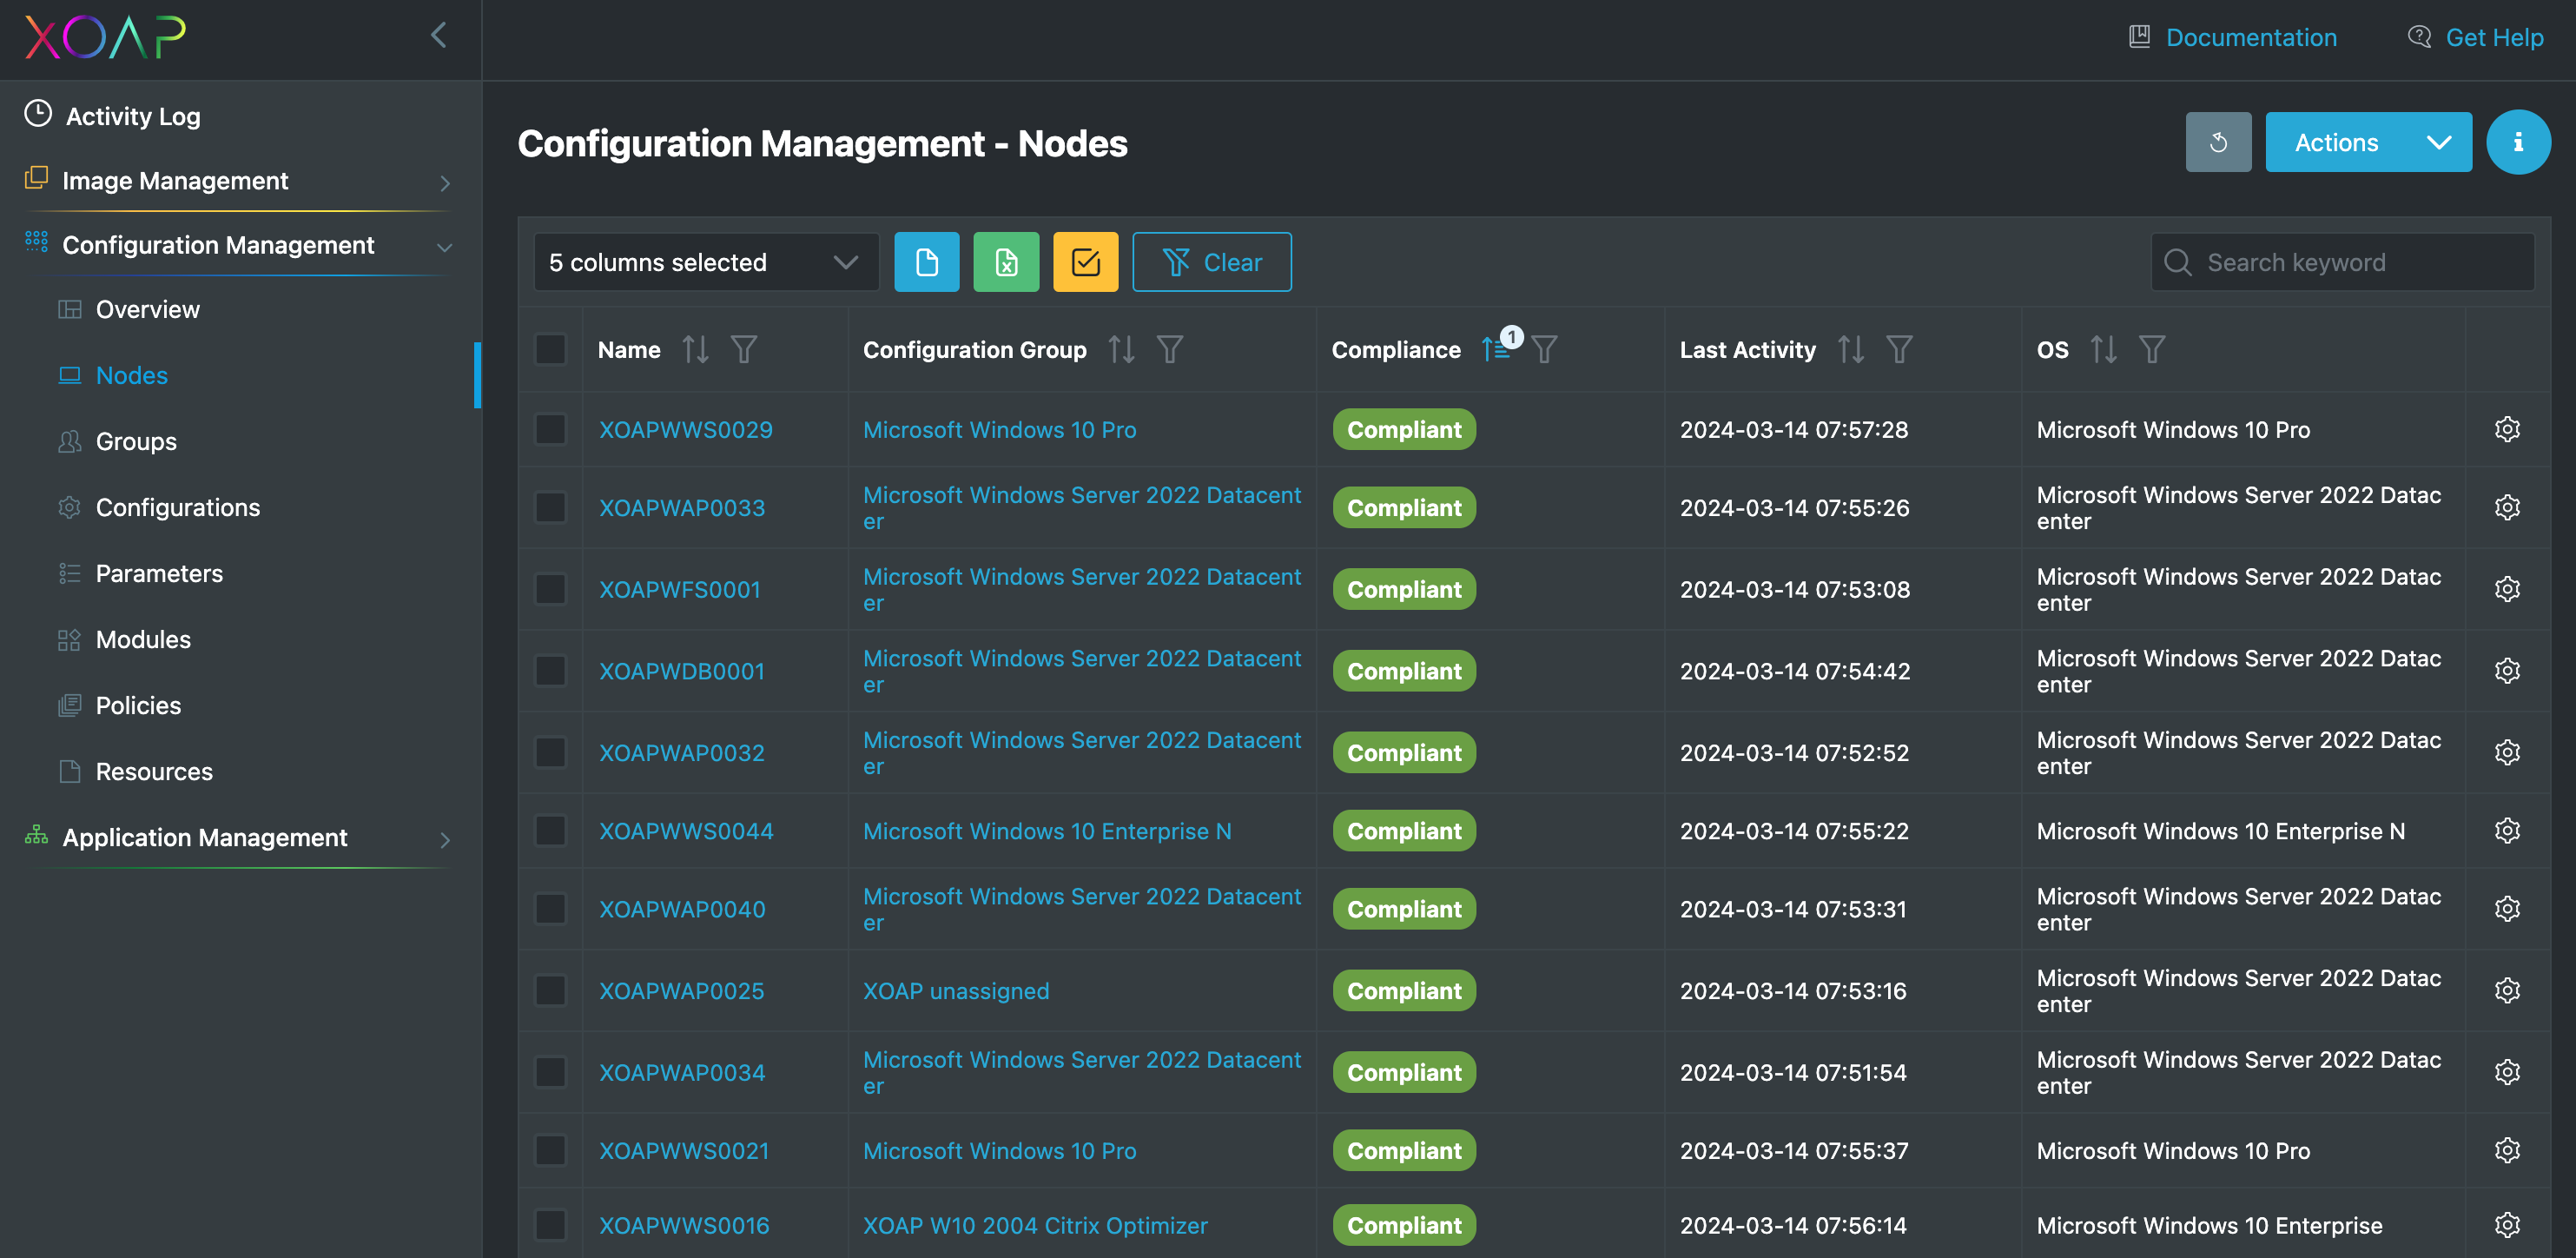
When the script is finished, you will be able to see your server in the Nodes tab in Configuration Management.
To install only the ControlUp agent, repeat the same process using the ControlUpAgent configuration group.
If you go to the node details, you’ll see the applied configurations, installed applications and server details.
By combining the different modules within XOAP, it’s possible to roll out further infrastructure and client components to the target systems without having to set up your own infrastructure.
Furthermore, commands can be received from ControlUp via API and sent to Amazon Web Services (AWS), Microsoft Azure and Google Cloud Platform (GCP).
This functionality is included in the platform.XO module and further information can be found here.