Table of contents
Safeguarding sensitive data is more crucial than ever, particularly as organizations increasingly rely on mobile devices and remote work environments. Among the array of security measures available, BitLocker stands out as a powerful encryption tool designed to protect data stored on Windows devices. However, many organizations face challenges in effectively deploying and managing BitLocker across their systems.
You can streamline the deployment of BitLocker using XOAP’s Configuration Management module. config.XO simplifies the implementation of BitLocker through Desired State Configuration (DSC), allowing IT administrators to automate and standardize encryption across managed devices. DSC ensures that systems remain compliant with organizational policies, reducing the risk of misconfigurations and ensuring that all devices are appropriately protected.
In this blog post, we will guide you through the process of implementing and managing BitLocker on Windows 10/11 (client solution) and Windows 2022 Datacenter (server solution).
With XOAP, you can begin the deployment process immediately. Simply create a free XOAP account and follow the steps below.
You can also download our BitLocker module and put it to use yourself.
Windows 10 and 11 (Client solution)
To encrypt a virtual machine disk using BitLocker, first you will need to enable Trusted Platform Module (TMP) in Hyper-V Manager.
To do this, open the VM settings and click on Security. In the Encryption Support section, check the Enable Trusted Platform Module box. Click here for detailed instructions.
Moving on to config.XO. If you haven’t yet, create a free XOAP account and go to your Workspace. In Configuration Management, create a new configuration or open an existing one.

Click Add resources.
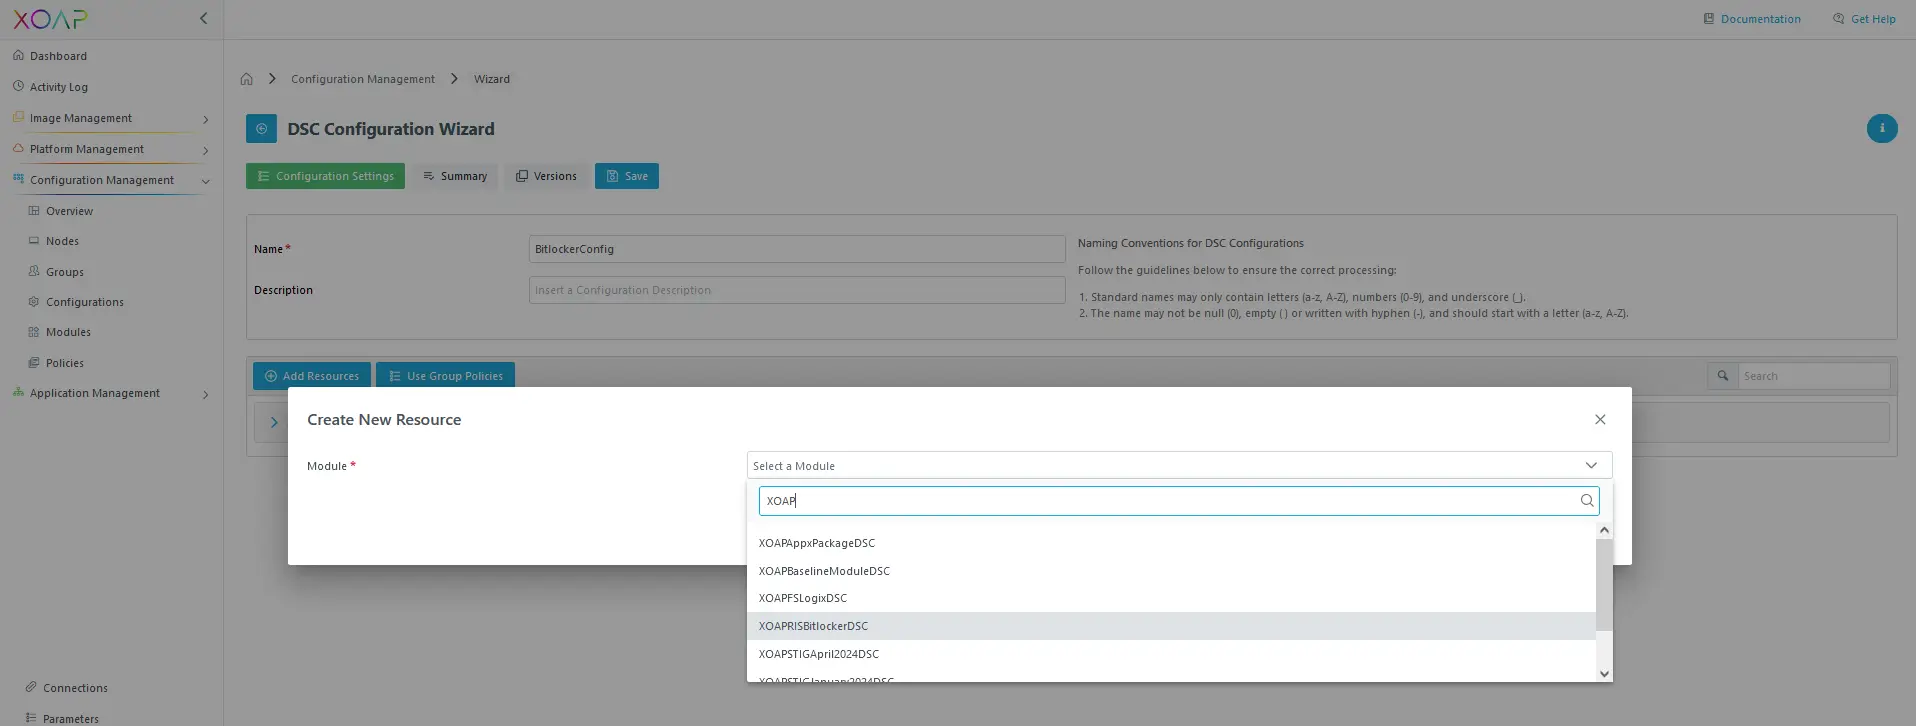
Select XOAPBitlockerDSC and add EnableBitlocker-DSC resource from XOAPBitlockerDSC-Module.
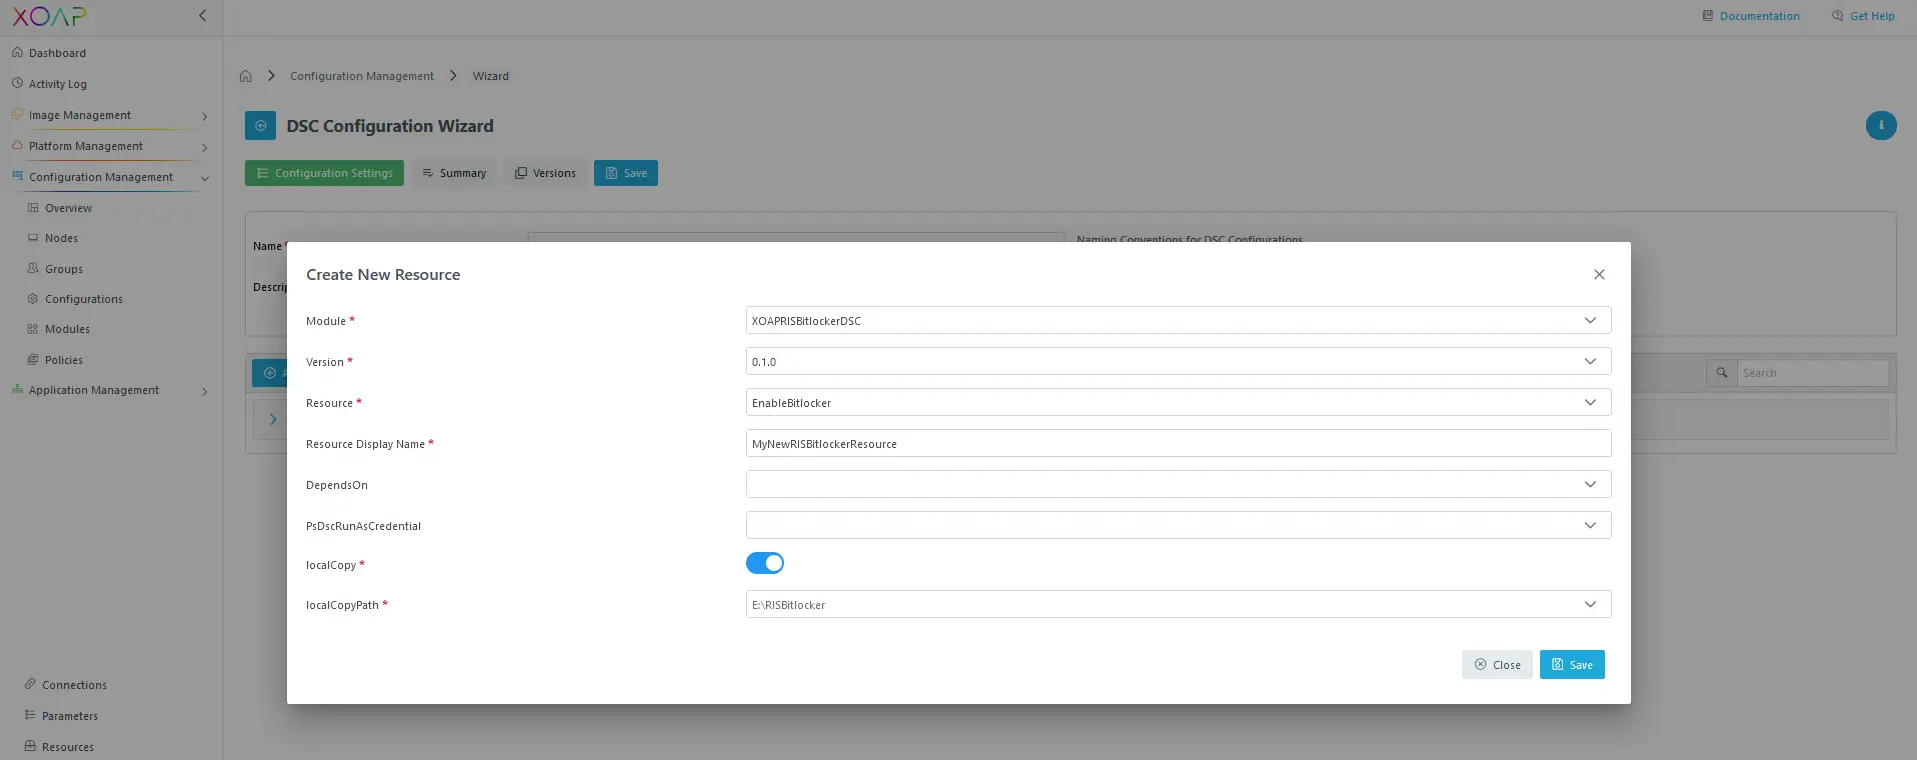
Save your configuration.
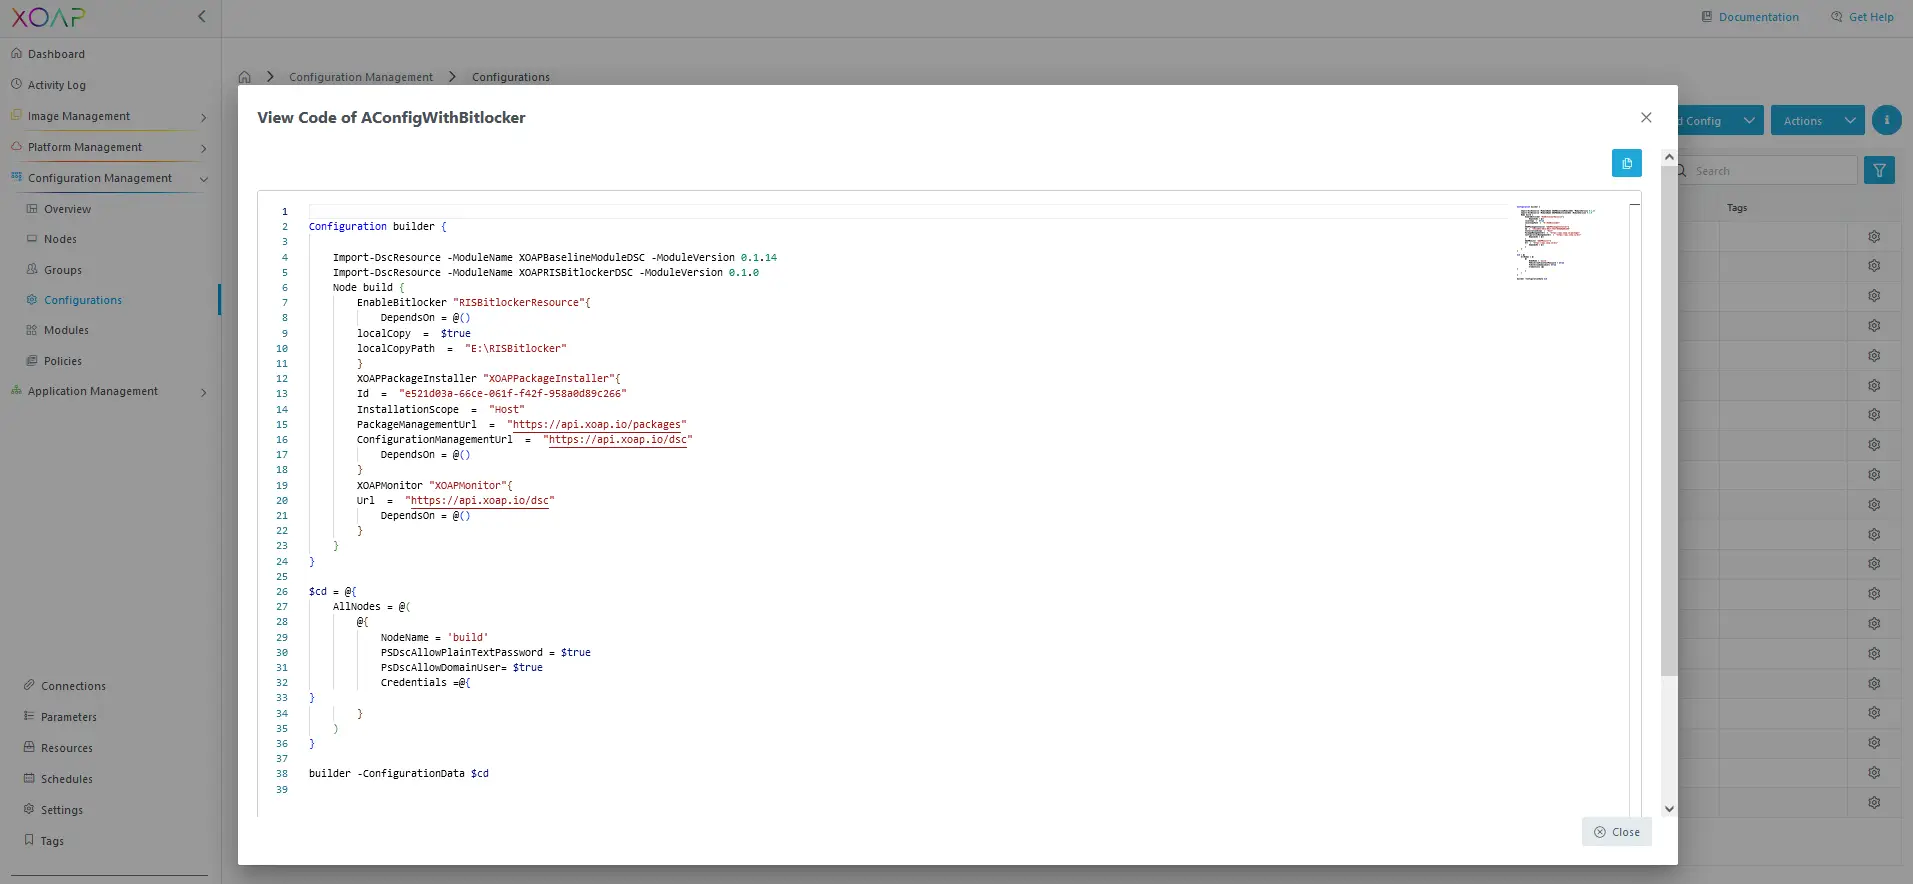
If the configuration is saved and compiled (this might take a few moments), you will see your DSC resources when you click on the View code option in your configuration.
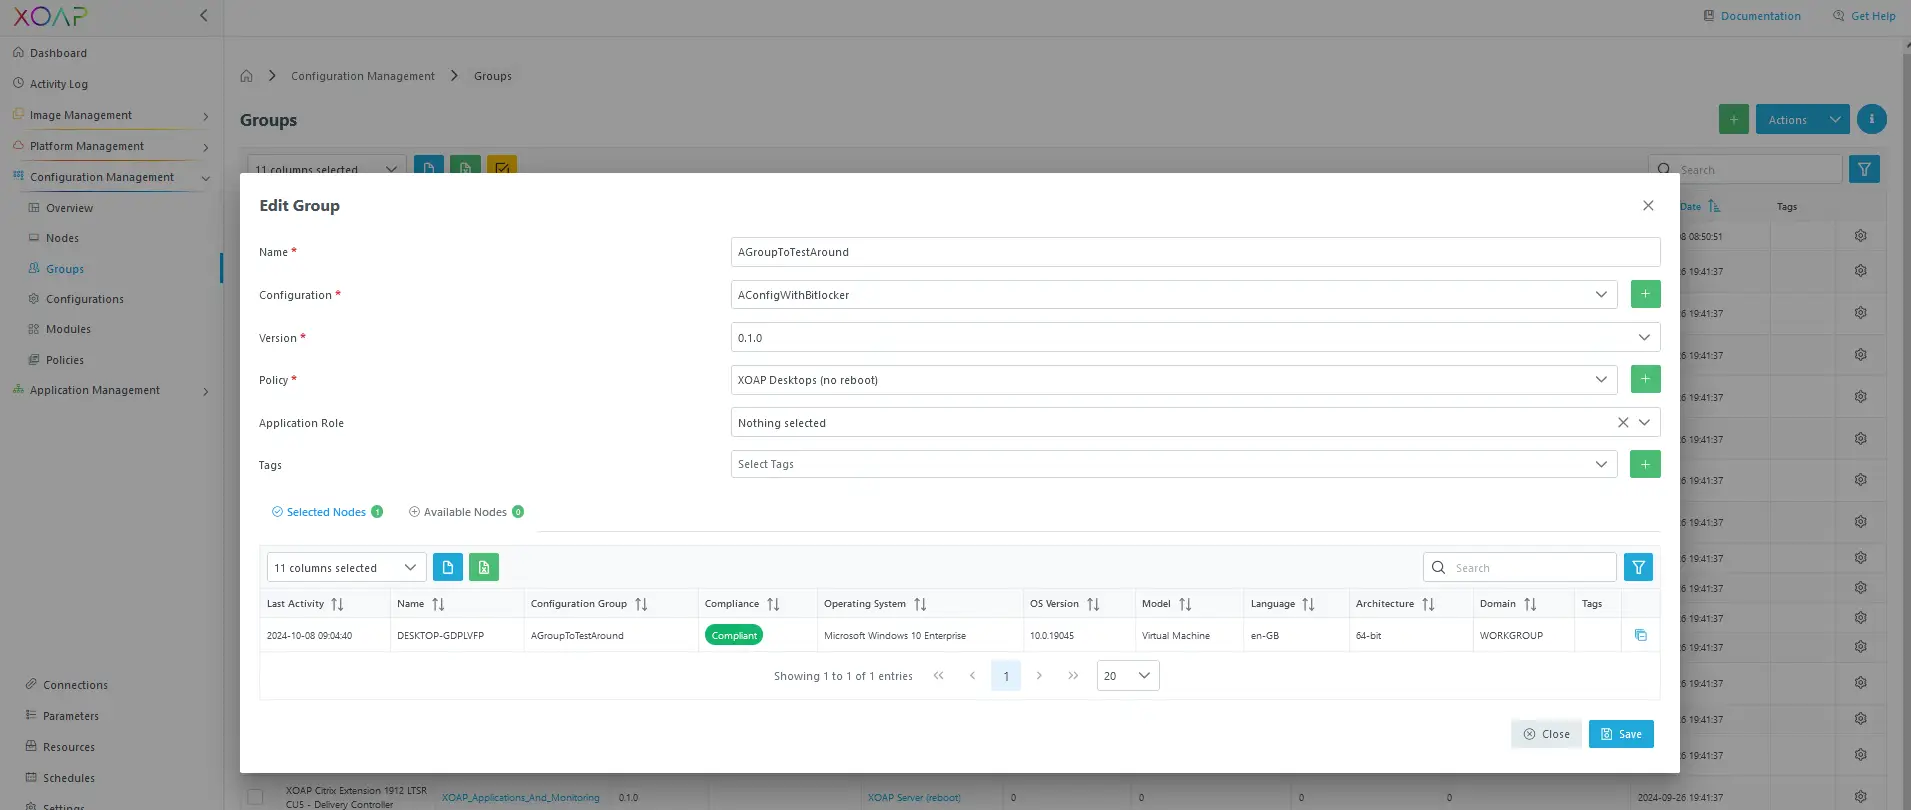
Now, go to Groups in Configuration Management and create a new group or choose an existing one.
In the Edit group screen, attach your configuration for BitLocker to that group.
Download the group registration script and run it on your machine.
Bitlocker Recovery Key will now be stored within your Microsoft Entra (if your device is already joined) and locally on the second drive you chose in the configuration.
Windows Server 2022 Datacenter (Server solution)
For the server solution, first you will need to install prerequisites with the PSDesiredStateConfiguration resources.
Specifically, you’ll need to enable the WindowsFeature and WindowsFeature RSAT-Feature-Tools-Bitlocker. These features are essential for ensuring that BitLocker operates effectively on your Windows Server 2022 Datacenter environment.
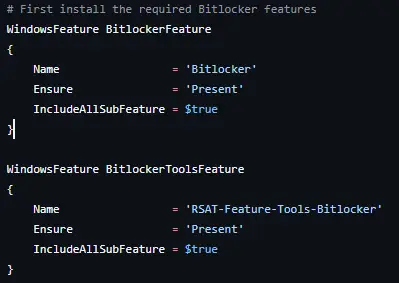
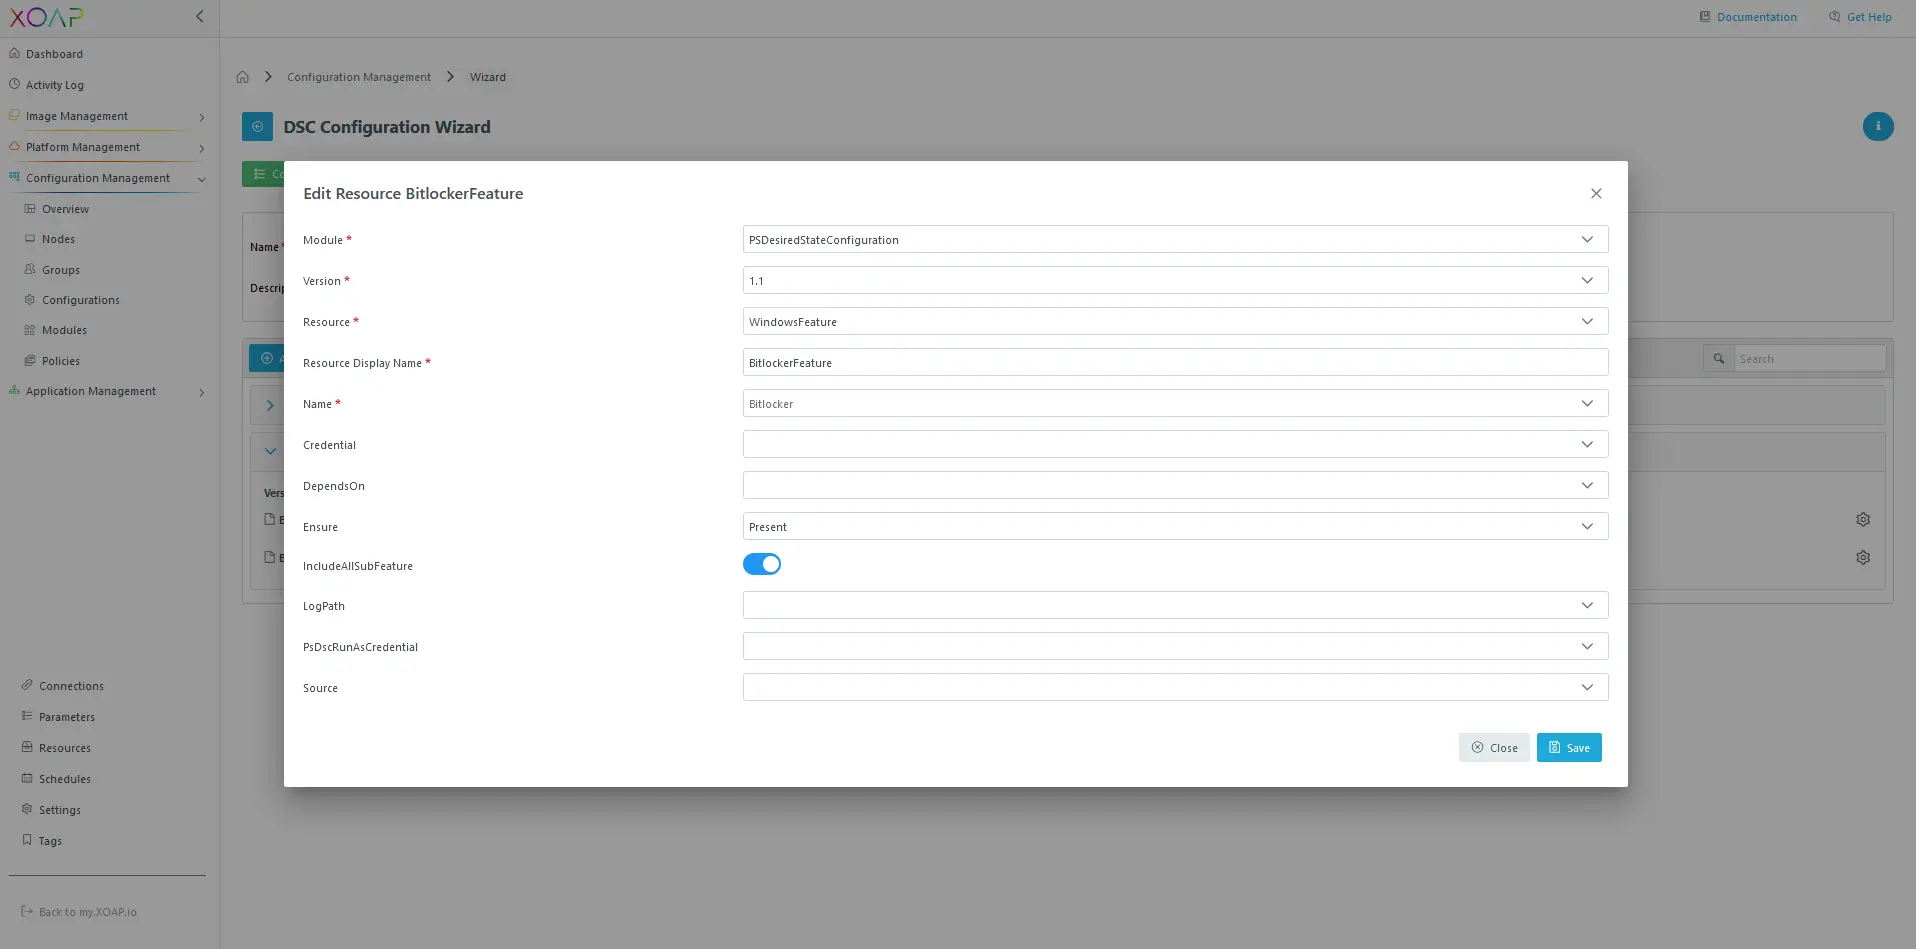
In XOAP, this will involve setting up two distinct DSC resources: one for the WindowsFeature and another for the RSAT-Feature-Tools-Bitlocker WindowsFeature. See screenshots below.
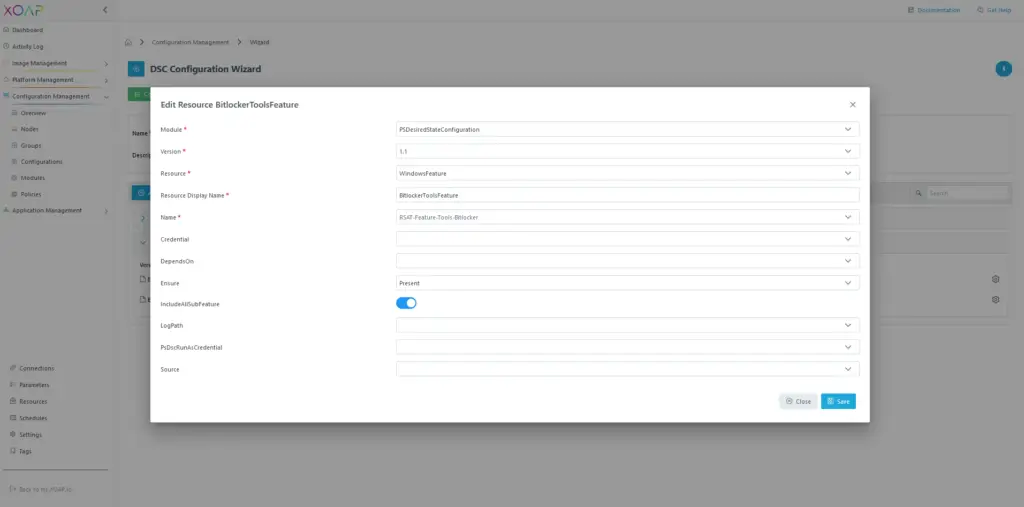
Please note:
• If you need to encrypt the system drive (e.g., C), you should use the DSC resource xBLBitLocker from our module as done here.
• To automatically enable BitLocker on fixed or removable drives, you should use the DSC resource xBLAutoBitLocker from our module. It does not work on operating system drives, but requires the OS to be encrypted. If you have multiple drives, use both DSC resources as done here.
Finalizing the configuration
Once you’ve completed your BitLocker configuration and linked it to a group within config.XO, download the group registration script associated with your BitLocker configuration.
Run the script on your machine, and after the required reboots, your drives should be successfully encrypted by BitLocker. ✅
Outcome
Windows 10 and 11 (Client solution).
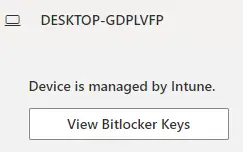
If the device is joined to the work (or school) organization’s Microsoft Entra ID, then the VM and the BitlockerKey will be stored in My Account > Devices area.
XOAP’s Configuration Management

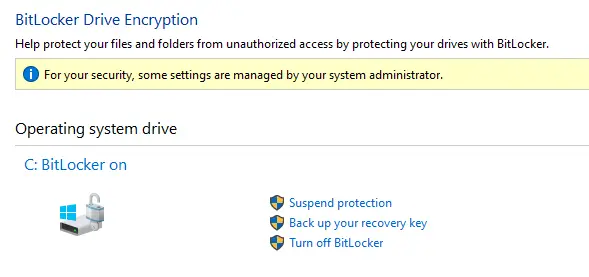
Locally on the VM (ResourceCount can vary)

Windows Server 2022 Datacenter (Server solution)
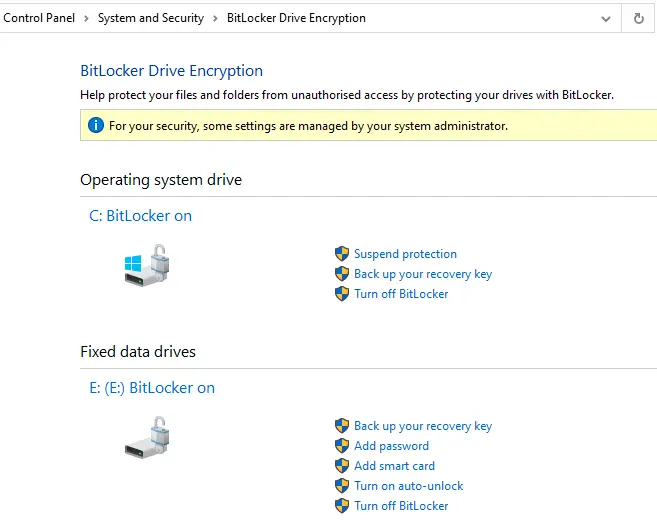
Backing up the Recovery Key is essential for ensuring you can regain access to your data. You can do this using the Windows option available in the Manage BitLocker settings.
Begin the deployment process immediately
So, are you ready to try it with XOAP? Just follow the steps above and you’ll be done in no time. The BitLocker module is directly available in your free Workspace. If you prefer to do this manually, download the BitLocker module.

