
Inhaltsübersicht
Das Erstellen eines benutzerdefinierten Images für Windows 365 war traditionell eine manuelle, mehrstufige Aufgabe. Eine Referenz-VM hochfahren, Anwendungen manuell installieren und konfigurieren, das Image an Intune übergeben… Ein vergessener Schritt bedeutet normalerweise, von vorne zu beginnen, und wenn dieser Ansatz für Golden Images mehrmals im Jahr wiederholt wird, wird er schwer zu reproduzieren.
XOAPs Image Management Das Modul ersetzt die manuelle benutzerdefinierte Bildsequenz durch eine definierte, wiederholbare Pipeline. Das Betriebssystem, der Build-Speicherort und das, was darauf installiert wird, werden jeweils einmal definiert, dann wird das Image bei Bedarf erstellt, ohne Capture-Skripte und ohne manuelle Zusammenstellung.
In diesem Blog führen wir Sie durch den Aufbau eines benutzerdefinierten Windows-Images für die Bereitstellung von Windows 365 Cloud-PCs und übergeben das fertige Image zur Verwendung in einer Bereitstellungsrichtlinie an Windows 365 – erledigt, automatisiert und vereinfacht mit XOAP.
Bevor Sie beginnen: Verbinden Sie Ihr Azure-Abonnement
XOAP benötigt eine funktionierende Verbindung zu Ihrem Azure-Abonnement, bevor es etwas erstellen kann. Wenn Sie XOAP noch nicht verwenden, erstellen Sie ein kostenloses Konto Um zu beginnen.
Gehen Sie zu Verbindungen > Neue Verbindung hinzufügen und benutze einen Dienstprinzipal mit Mitwirkender Rollenberechtigung.
Sie können einen mit der Azure CLI erstellen:
az ad sp create-for-rbac –name xoap-image-principal –role Contributor –scopes /subscriptions/ –years 1
Nehmen Sie das Ergebnis Abonnement-ID, Mieter-ID, Kunden-ID und Client-Geheimnis und geben Sie diese in die Verbindungsdetails in XOAP ein.
Der Aufbau auf einen Blick
Die gesamte Pipeline besteht aus fünf Schritten in XOAP plus einem Übergabepunkt in Intune:
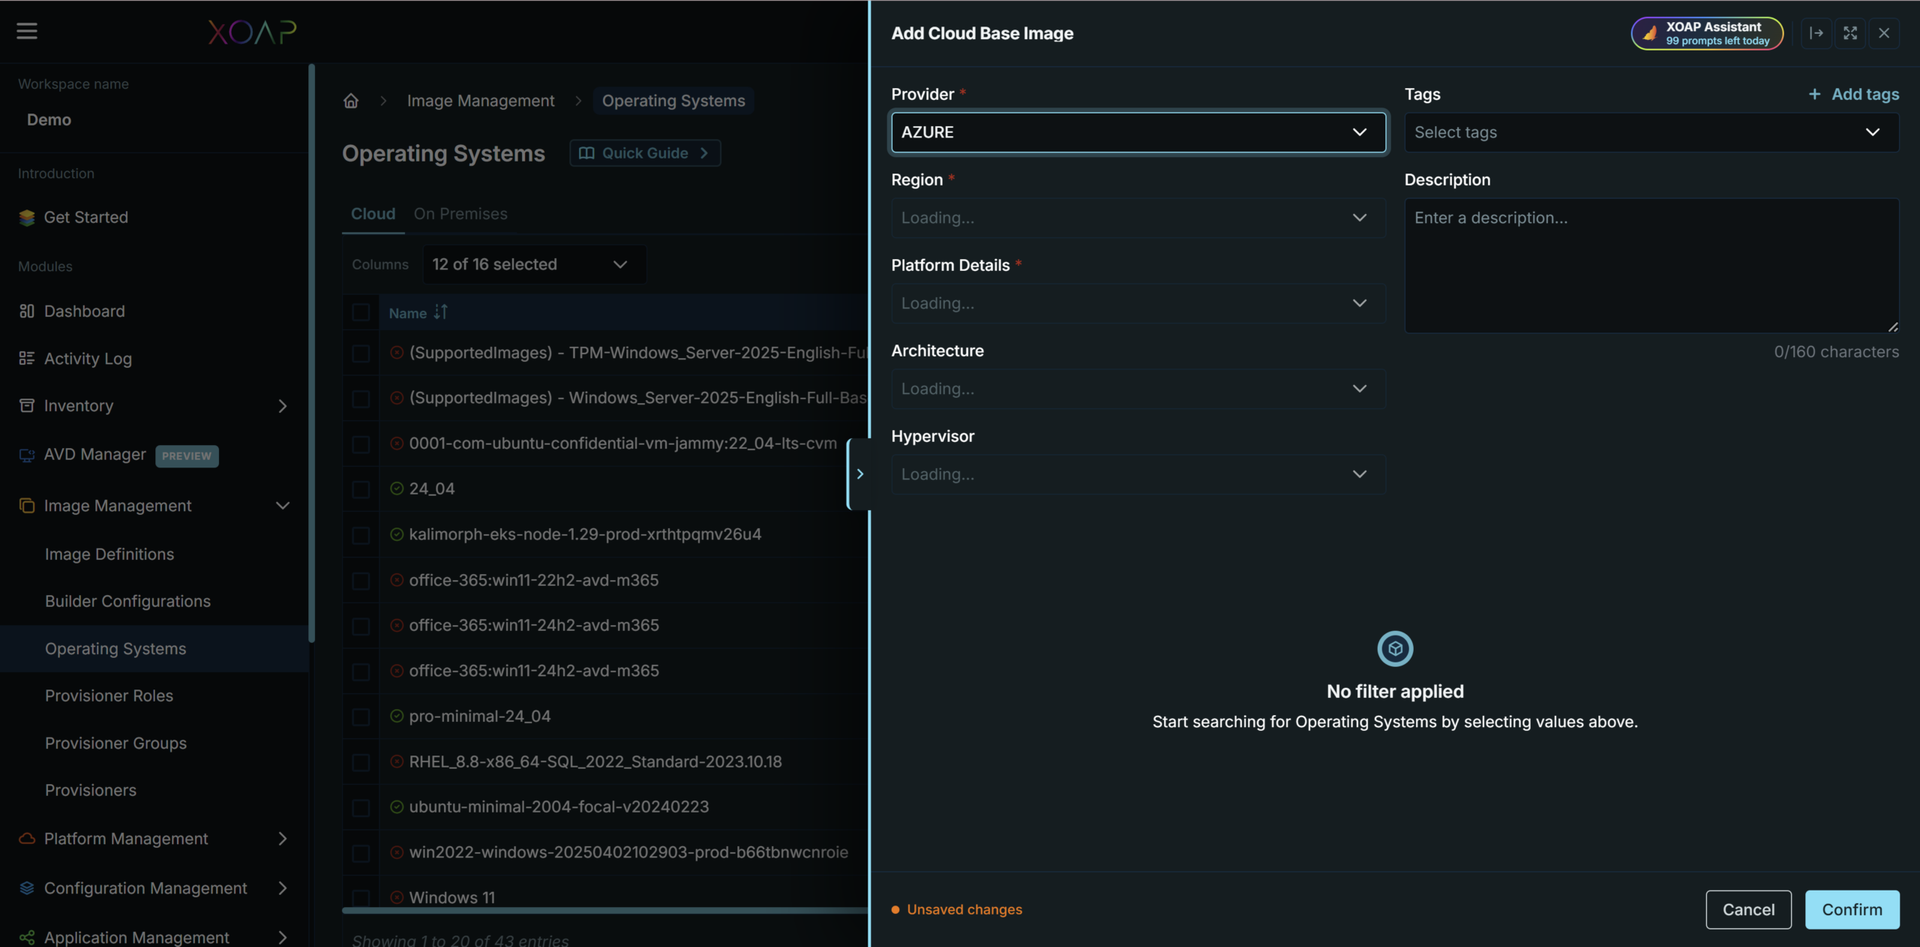
Unter Image Management > Betriebssysteme, fügen Sie das Windows-Basis-Image hinzu, von dem Sie bauen möchten.
2. Unter Image Management > Builder-Konfiguration, definieren Sie, wo und wie das Bild erstellt wird.
3. Unter Image Management > Provisioner / Provisioner-Gruppen / Provisioner-Rollen, definieren, was installiert und konfiguriert wird.
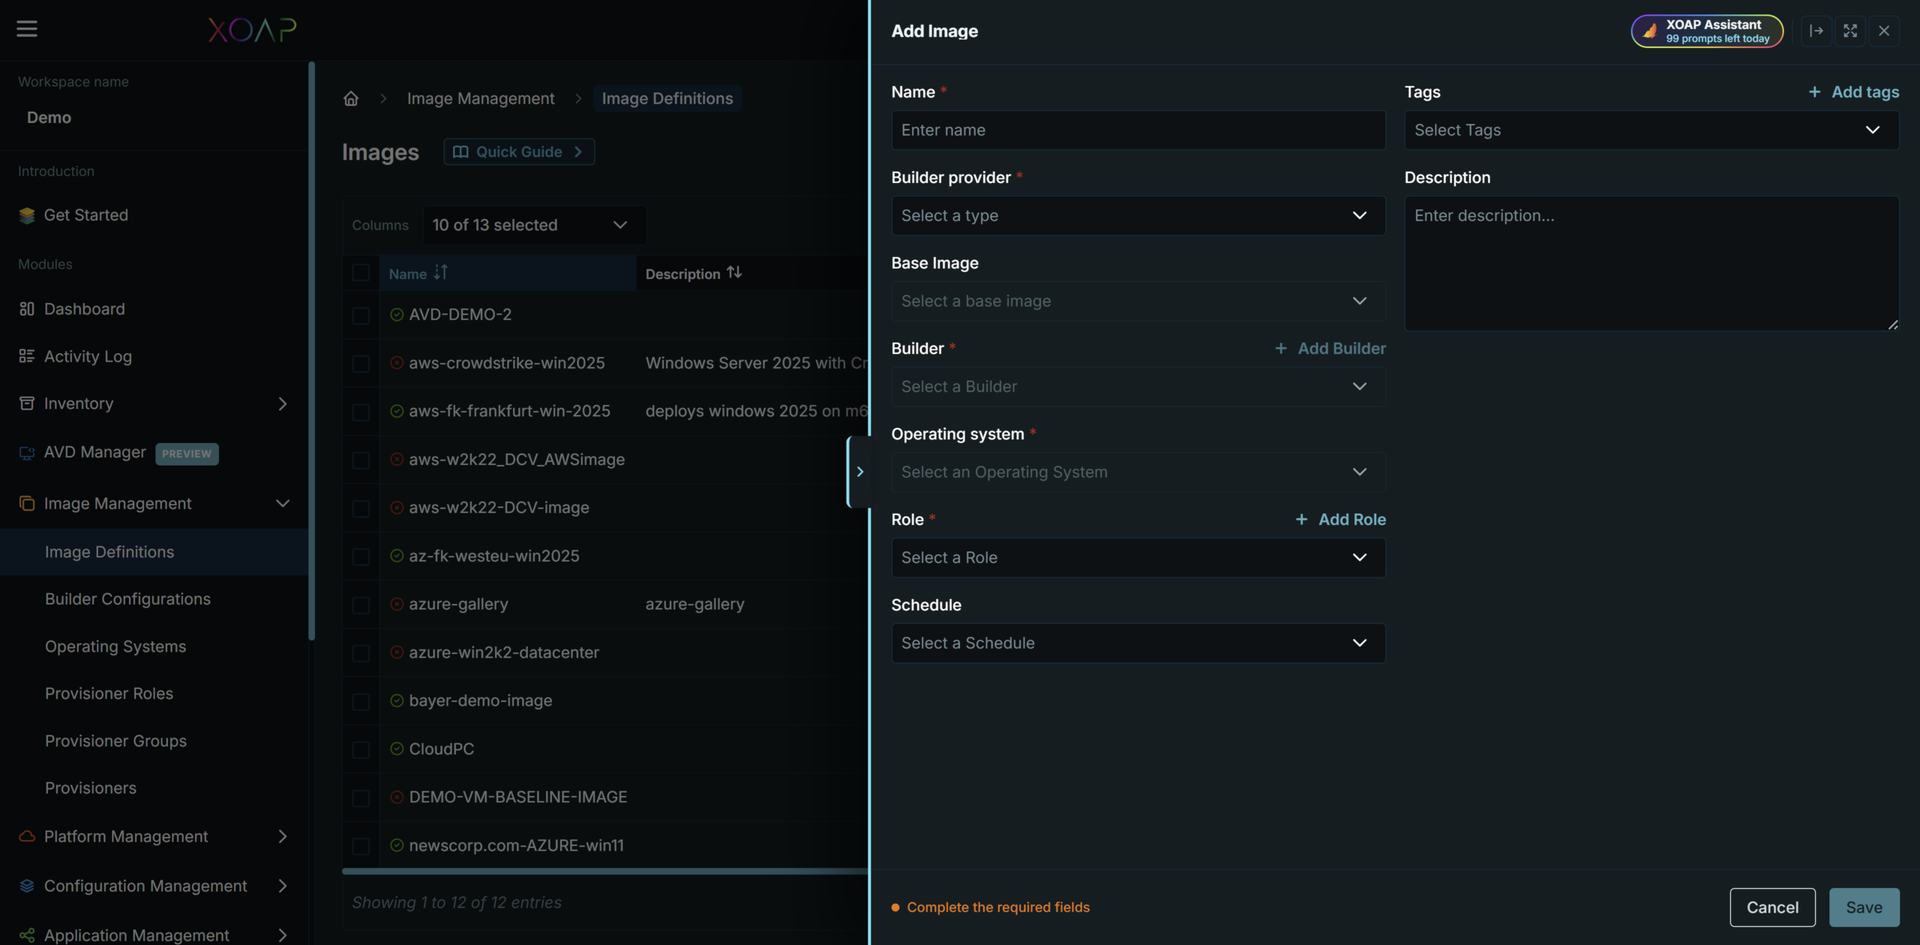
4. Unter Image Management > Bilddefinitionen, klicken + Neues Bild und die Betriebssystem-, Builder-Konfigurations- und Provisioner-Rolle in einer einzigen Definition zusammenfassen.
5. Speichern Sie, klicken Sie dann mit der rechten Maustaste auf die Bilddefinition und wählen Sie ausführen..
Sobald der Lauf erfolgreich ist, suchen Sie das fertige Image in Azure und laden Sie es als benutzerdefiniertes Image in Windows 365 hoch.
Lass uns nun tiefer in jeden Schritt eintauchen.
Schritt 1: Wählen Sie das Betriebssystem
Unter Betriebssystemeauswählen Wolke, dann wähle die Azurblau Anbieter-, Regions- und Plattformdetails.
Für Windows 365, verwenden Sie Enterprise Cloud-PC Bildfamilie: Angebot windows-ent-cpc, SKU win11-25h2-ent-cpc (oder die neueste verfügbare Version und Veröffentlichung).
Dies ist die spezielle Cloud-PC-Edition von Microsoft: Enterprise, Single-Session und bereits für Windows 365-Szenarien optimiert.
Der Start von der richtigen Basis erspart Ihnen später das mühsame Formen des Bildes.
Schritt 2: Definieren Sie die Builder-Konfiguration
Die Builder-Konfiguration teilt XOAP mit, wo das Image erstellt wird und was es produziert.
Neue Konfiguration mit folgenden Einstellungen erstellen:
• TypAzure Managed. Dies erstellt ein Standard-Managed-Image im Azure-Portal, die einfachste und direkteste Option für benutzerdefinierte Images von Windows 365.
VerbindungIhre Azure-Verbindung aus dem Einrichtungsschritt.
• Region: Ihre Zielregion, zum Beispiel Westeuropa.
Instanztypdie Größe der temporären Build-VM, die nur während des Builds verwendet wird, z. B. Standard_D2s_v3. Diese VM wird automatisch erstellt und abgebaut und hat keinen Einfluss auf die Leistung des endgültigen Cloud-PCs, daher ist es nicht notwendig, sie übermäßig groß zu dimensionieren.
Typ des SpeicherkontosStandard_LRS.
Wenn Sie Hilfe bei der Einrichtung benötigen, klicken Sie auf die Schaltfläche XOAP Assistant, um KI-gestützte Antworten in Sekundenschnelle zu erhalten, ohne Ihre aktuelle Aufgabe zu unterbrechen.
Schritt 3: Definieren, was auf dem Bild zu sehen sein soll
Diese Schicht ist, wo das Bild aufhört, ein Standard-Betriebssystem zu sein und zu Ihrem wird.
Beisteller definieren, was installiert und konfiguriert wird auf dem Basissystem: Anwendungen, Einstellungen, PowerShell-Skripte, DSC-Konfigurationen oder PSADT-Pakete.
XOAP stellt Beispiel-Provisionierer als Schnellstart-Vorlagen, aber du bist nicht darauf beschränkt. Vollständig benutzerdefinierte Provider werden ebenfalls unterstützt. Jedes von Ihnen selbst erstellte Skript oder Paket kann hinzugefügt werden und genau wie die eingebauten verwendet werden.
gruppieren Sie die von Ihnen benötigten Provisioner in eine Versorgergruppe, dann befestigen Sie diese Gruppe an einem Bereitsteller Rolle.
Eine praktische Regel, die es wert ist, befolgt zu werden:
Definieren Sie immer ein Timeout für jeden Provisoner, damit ein langlaufendes Skript nicht den gesamten Build zum Stillstand bringen kann.
Schritt 4: Kombinieren Sie es zu einer Bilddefinition
Die Bilddefinition ist dort, wo die drei Schichten zusammenlaufen. Unter Bilddefinitionen, klicken + Neues Bild und ausfüllen:
• Name und Beschreibung
Bauunternehmerdie oben erstellte Builder-Konfiguration
Betriebssystemdas oben ausgewählte Cloud-PC-Image
• Rolledie oben erstellte Provisioniererrolle
Speichern Sie die Definition, klicken Sie dann mit der rechten Maustaste darauf und wählen Sie ausführen..
Sie können den Fortschritt über das Feld „Runs“ in der oberen rechten Ecke verfolgen. Die Protokoll-Streamingfunktion ist über „Toggle Logs“ verfügbar. Ein Lauf durchläuft die folgenden Status: Wartend, Läuft, Erfolgreich, Fehlgeschlagen und Gestoppt.
Die Live-Protokolle sind der Ort, an dem Sie einen fehlerhaften Provisionierer frühzeitig erkennen, anstatt nach einem fehlgeschlagenen Build.
Schritt 5: Finde das fertige Bild
Da die Builder-Konfiguration verwendet wurde Verwaltetes Azure, wird das resultierende Bild angezeigt Azure Portal > Bilder, benannt nach der Bilddefinition mit einem Versionssuffix, z. B. CloudPC-v1.
Wenn Sie eine Azure Galerie builder stattdessen würde das Bild in Azure Portal > Shared Image Gallery, mit Unterstützung für Versionierung und Multi-Region-Replikation.
Für einen Einzelnen Windows 365 benutzerdefiniertes Image, das verwaltete Image ist der einfachere Weg.
Schritt 6: Übergabe an Windows 365
XOAP baut das Azure-Image, aber die Windows 365-Bereitstellung wird separat verwaltet, sodass der letzte Schritt in Intune stattfindet:
1. Wechseln Sie zum Intune-Admin Center > Geräte > Cloud-PCs bereitstellen > Benutzerdefinierte Images > Hinzufügen > Verwaltetes Image.
2. Wählen Sie das Abonnement und das von XOAP erstellte Image aus.
3. Geben Sie einen Bildnamen und eine Version an, z. B. 1.0.0.
4. Windows 365 validiert das Image und bestätigt, dass es als Cloud PC erfolgreich gestartet und bereitgestellt wird, bevor es verfügbar ist.
5. Nach der Validierung wählen Sie es als Quellbild bei der Erstellung einer Bereitstellungsrichtlinie aus.
Dieser Validierungsschritt ist Ihr Sicherheitsnetz. Ein benutzerdefiniertes Image kann erst ausgewählt werden, wenn Windows 365 bestätigt hat, dass es tatsächlich bereitgestellt wird, sodass eine fehlerhafte Erstellung nie Ihre Benutzer erreicht.
Warum die Pipeline wichtig ist
Im nächsten Quartal, wenn Sie das gleiche Image mit einer zusätzlichen Anwendung oder einem aktualisierten Basissystem benötigen, ändern Sie eine Schicht und führen es erneut aus. Zwei Administratoren, die dieselbe Definition verwenden, erzielen dasselbe Ergebnis. Das manuelle Golden-Image-Ritual und die damit einhergehende Abweichung sind verschwunden.
Das ist der Sinn des Erstellens von Bildern mit XOAP's Image ManagementReproduzierbarkeit müssen Sie nicht über so viele Image-Versionen nachdenken, wie Ihre Cloud-PC-Umgebung benötigt.
Läuft bei dir auch Azure Virtual Desktop?
Der gleiche Image Management-Workflow erstellt auch die Golden Images für AVD-Host-Pools. Von dort aus, XOAPs AVD-Manager kümmert sich um die operative Seite: rollierende Image-Rollouts mit Ein-Klick-Rollback, Autoscaling, Pool-spezifische Kostenverfolgung und Patching über die gesamte Flotte hinweg. AVD Manager ist standardmäßig Teil der XOAP-Plattform – keine zusätzlichen Konten, Installationen oder weiteren Schritte erforderlich.